How to Use VARCO 3D Rig Editor
2026-08-10 · tutorial
AI rigging quickly prepares a character for animation, but joint placement and skin weights may still need adjustment depending on the model's proportions, clothing, and accessories. VARCO 3D Rig Editor lets you review the rig with test poses and edit its skeleton and skin weights without switching to another 3D application.
We recommend the following review loop:
- Move the joints in Pose mode to find deformation problems.
- If the problem comes from joint placement or hierarchy, correct it in Skeleton mode.
- If part of the mesh follows the wrong joint, fix its influence in Weights mode.
- Return to Pose mode, verify the result, and select Apply Rig Edit.
This guide walks through the complete review and editing workflow.
Rig Editor is available on desktop for completed rigged assets. On the Free plan, you can review poses, but Skeleton editing, Weight Painting, and applying the edited rig are unavailable.
Open Rig Editor
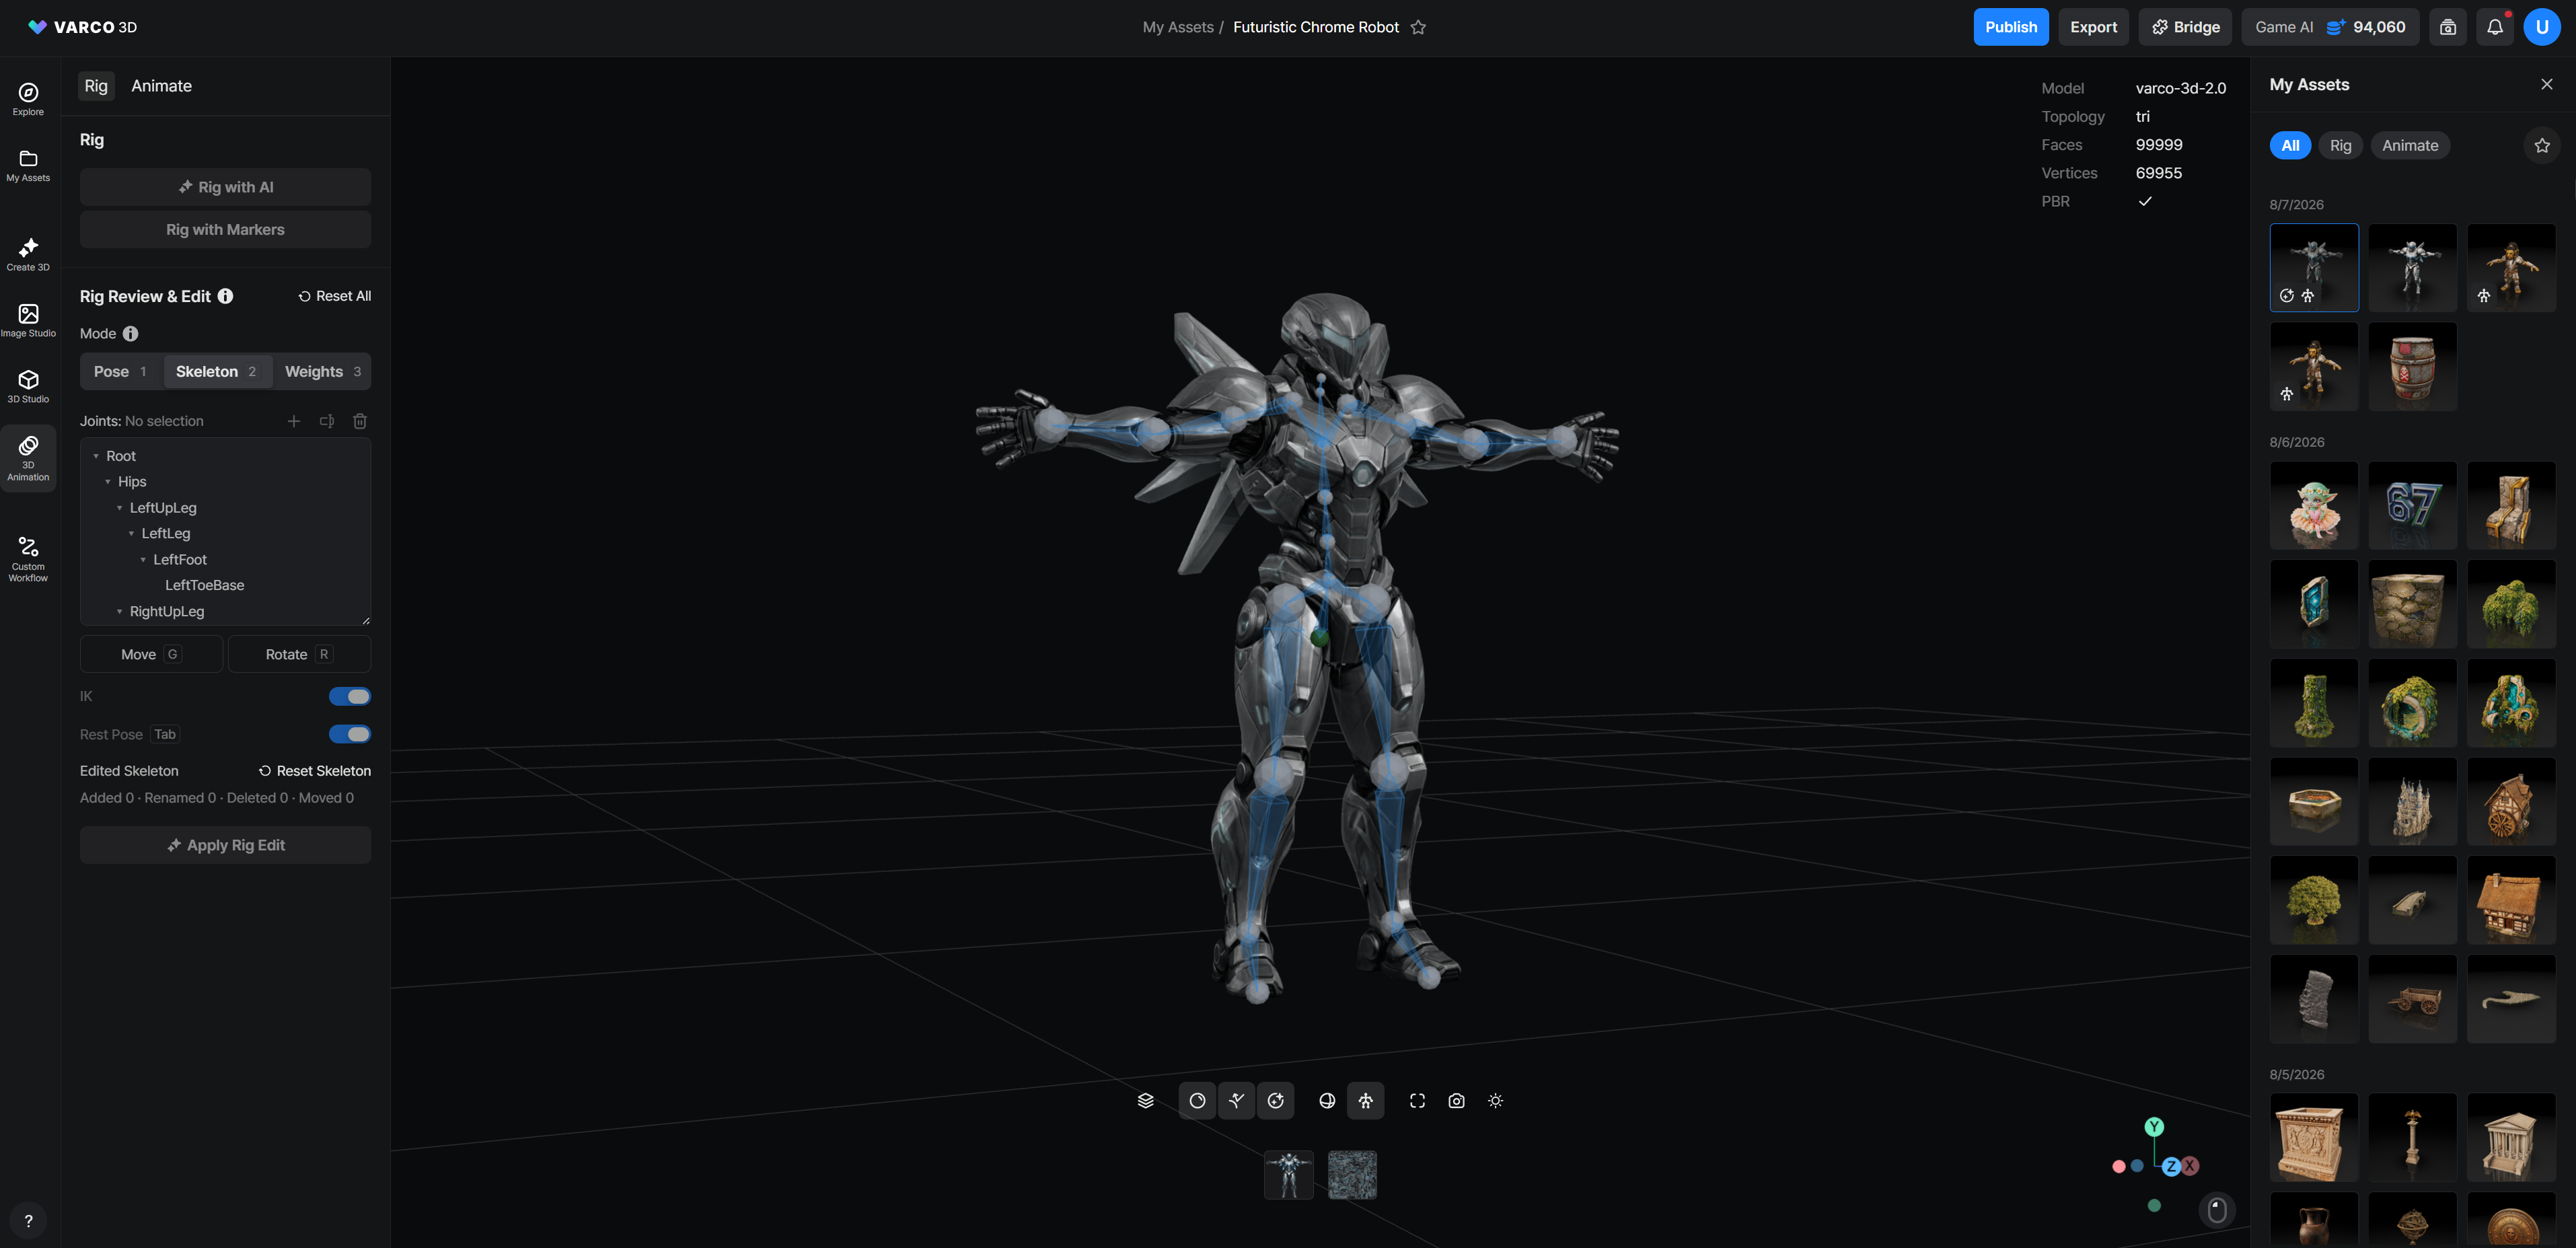
First, select an asset with a completed AI Rig task. Open the Rig tab in the left panel of Animate Studio to find the Rig Review & Edit section.
Rig Editor provides three modes:
- Pose: Move joints to review how the rig deforms.
- Skeleton: Edit joint placement, orientation, names, and parent-child relationships.
- Weights: Edit skinning weights (how strongly each joint influences each part of the mesh) with a brush.
Select a mode from the panel or press 1, 2, or 3. You can expand and collapse the hierarchy in the joint list. Hovering over a joint in the list highlights the corresponding joint in the viewport.
1. Review the rig with test poses
Select and move a joint
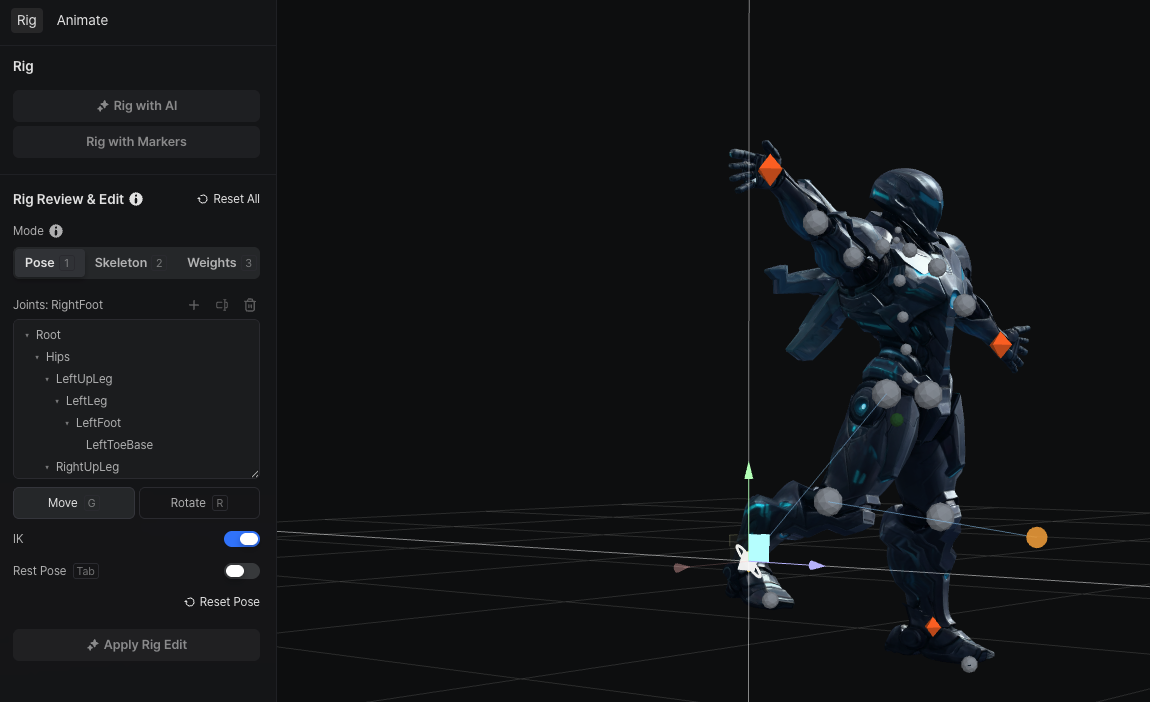
Select Pose mode or press 1. Choose a joint in the viewport or from the joint list in the left panel.
You can manipulate the selected joint in two ways:
- Select Move or press G to translate the joint.
- Select Rotate or press R to rotate the joint around an axis.
The corresponding transform gizmo appears in the viewport. Drag an axis or rotation ring to build a test pose. Selecting a joint while viewing the rest pose automatically switches back to the pose view, so you can start manipulating it immediately.
Use IK to move arms and legs
When IK is enabled, moving a limb endpoint such as a hand or foot also solves the elbow or knee. Drag a hand or foot effector and check whether the entire limb follows naturally.
The IK toggle is disabled for skeletons without a supported limb chain. You can also turn IK off and rotate individual joints when you need precise control over an angle.
What should you inspect?
Test a broad range of motion instead of checking only one pose.
- Raise the arms and check for excessive collapsing or stretching around the shoulders and armpits.
- Bend the elbows and knees and make sure unrelated parts of the mesh do not move with them.
- Rotate the wrists and ankles and check for sudden twisting or inversion.
- Compare the left and right limbs for inconsistent deformation.
- Check whether clothing or accessories follow an unintended joint.
Use the Rest Pose toggle or press Tab to switch quickly between the rest pose and your test pose. Select Reset Pose to clear only the current test pose.
Pose mode is a review tool. The test pose itself is not saved as the new asset's rest pose.
2. Adjust joint placement and hierarchy
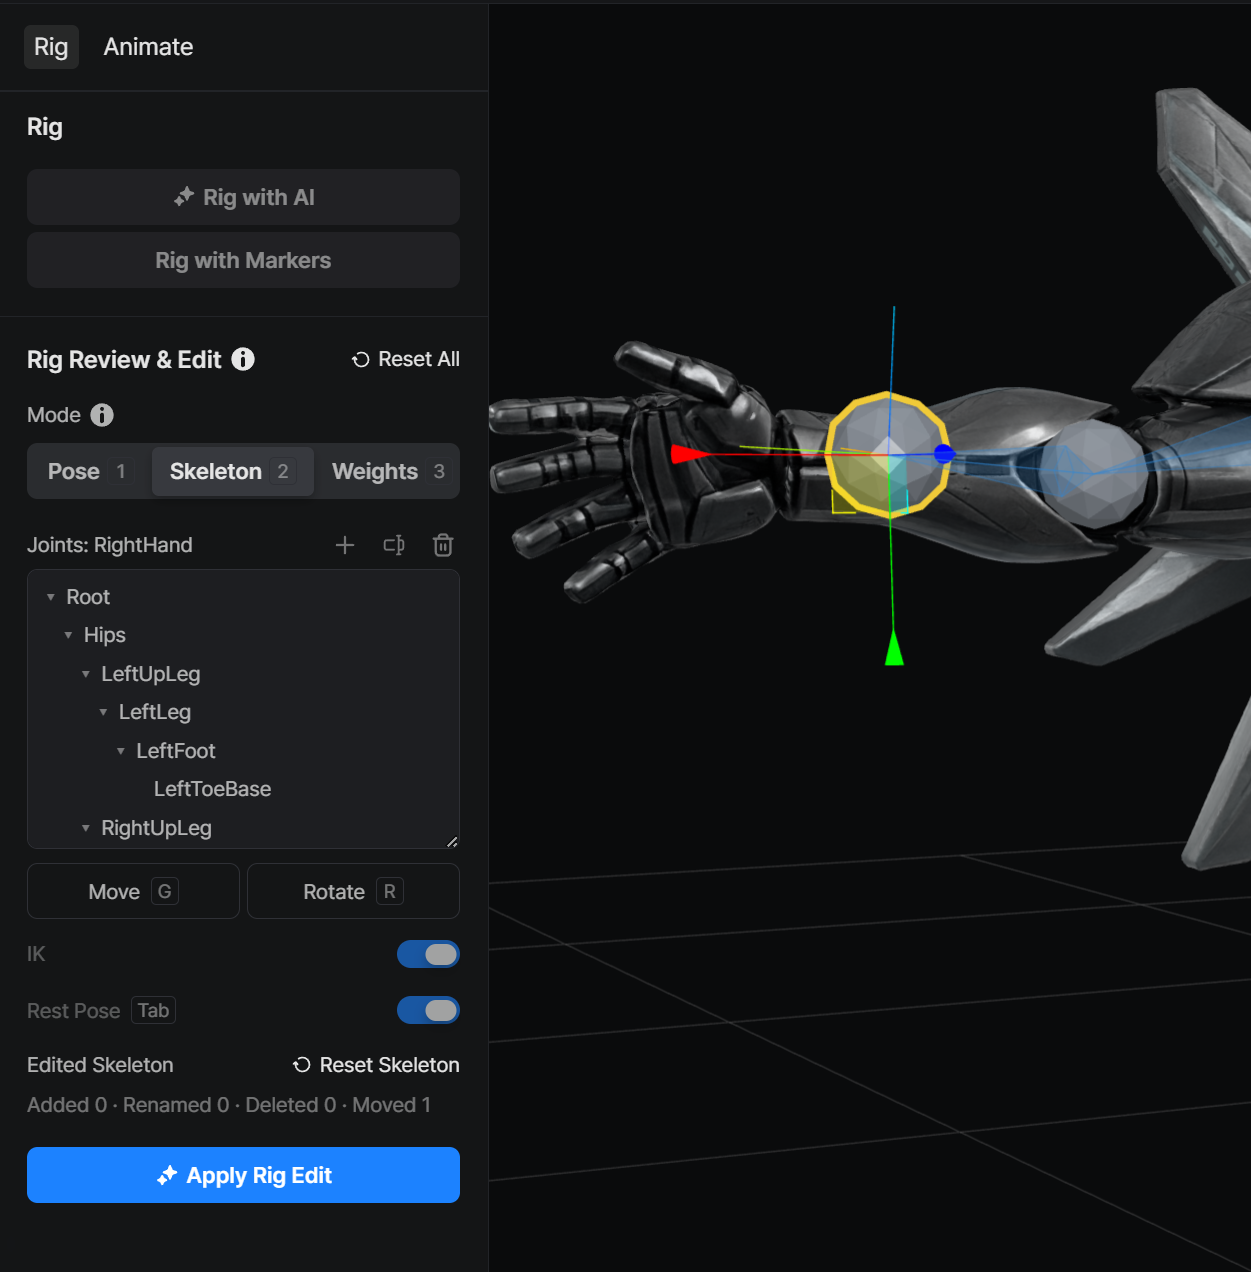
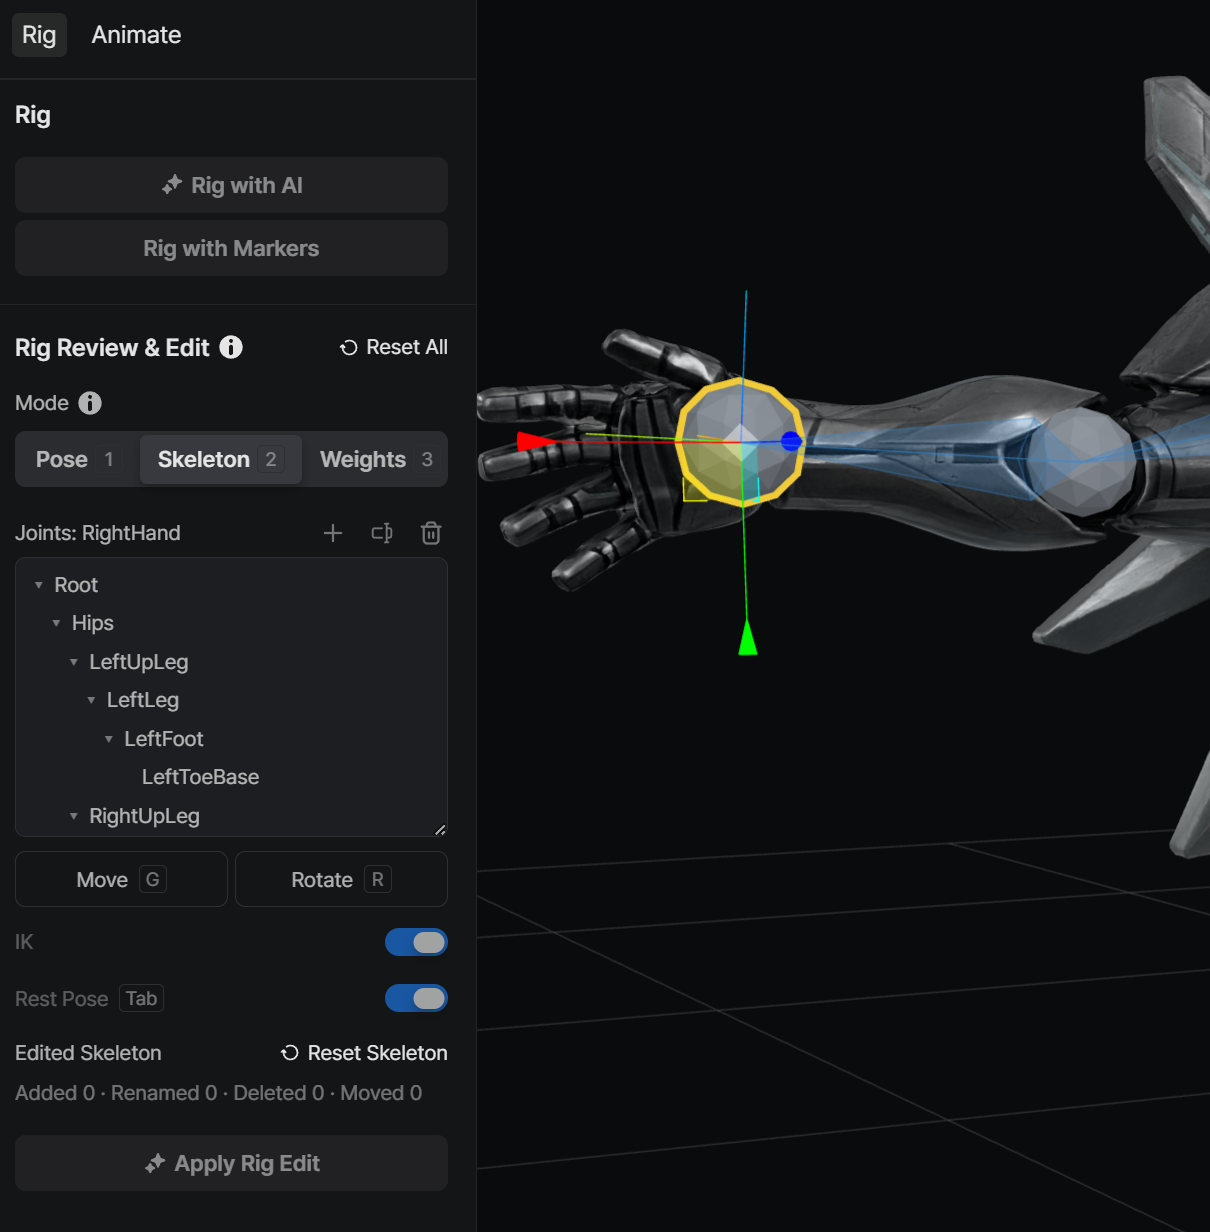
If a joint rotates around the wrong point during the pose test, correct the skeleton before painting weights. Select Skeleton mode or press 2. Skeleton editing takes place in the rest pose.
Adjust joint placement and orientation
Select a joint, then use Move (G) or Rotate (R) to adjust its placement and orientation. Moving a joint also changes the length of the bone that connects it to its parent. For example, moving an elbow joint to the character's actual bending point adjusts the upper-arm and lower-arm bone lengths around that point.
To move multiple joints together, hold Shift and click each joint before dragging the gizmo. This is useful for adjusting a group of nearby joints, such as finger joints, in the same direction. Rename, add, and delete actions are disabled during multi-selection, so select a single joint before changing the skeleton structure.
The mesh surface remains in place while you adjust joint positions. Return to Pose mode and move the edited joint to review its new rotation center and deformation.
Add a missing joint
- Select the joint that will become the new joint's parent.
- Select the + button above the joint list.
- Enter an appropriate name when the new child joint is created and its inline name field opens.
- Press Enter or click outside the field to confirm the name.
The new joint is initially placed using the direction and length of its parent bone. Adjust its position and orientation to fit the model.
Rename a joint
Select one joint and use the Rename icon, or double-click its name in the list. A joint name cannot be empty or duplicate another joint name.
Joint names are key identifiers for animation retargeting. Renaming a standard joint may prevent an existing animation profile from finding it, so rename standard joints only when you understand the compatibility impact. Renaming a newly added joint does not change the names of standard joints.
Delete a joint
Select one joint and use the trash button, or press Delete/Backspace. Deletion takes effect immediately, but you can undo it with Ctrl/Cmd+Z. At least one bone must remain in the skeleton.
When you delete a joint, its skin weights move to the nearest surviving ancestor. If you delete a root joint that has no surviving ancestor, its weights move to the first remaining joint. Review the pose and weight map again after deleting a joint.
Change a joint's parent
Drag a row in the joint list onto a new parent joint to change the parent-child relationship. You cannot drop a joint onto itself, its current parent, or one of its descendants. Only valid drop targets accept the operation.
Check animation compatibility
Skeleton edits can affect animation compatibility.
- Move or rotate only: Joint names stay intact, so the animation name mapping is preserved.
- Add a joint: Existing animations do not provide an independent translation or rotation for the new joint, but it still follows its parent.
- Rename or delete a standard joint: If a required animation-profile joint name is missing, animations cannot be applied to the resulting asset.
- Change a parent-child relationship: Even when names stay the same, transform propagation and the resulting pose can change.
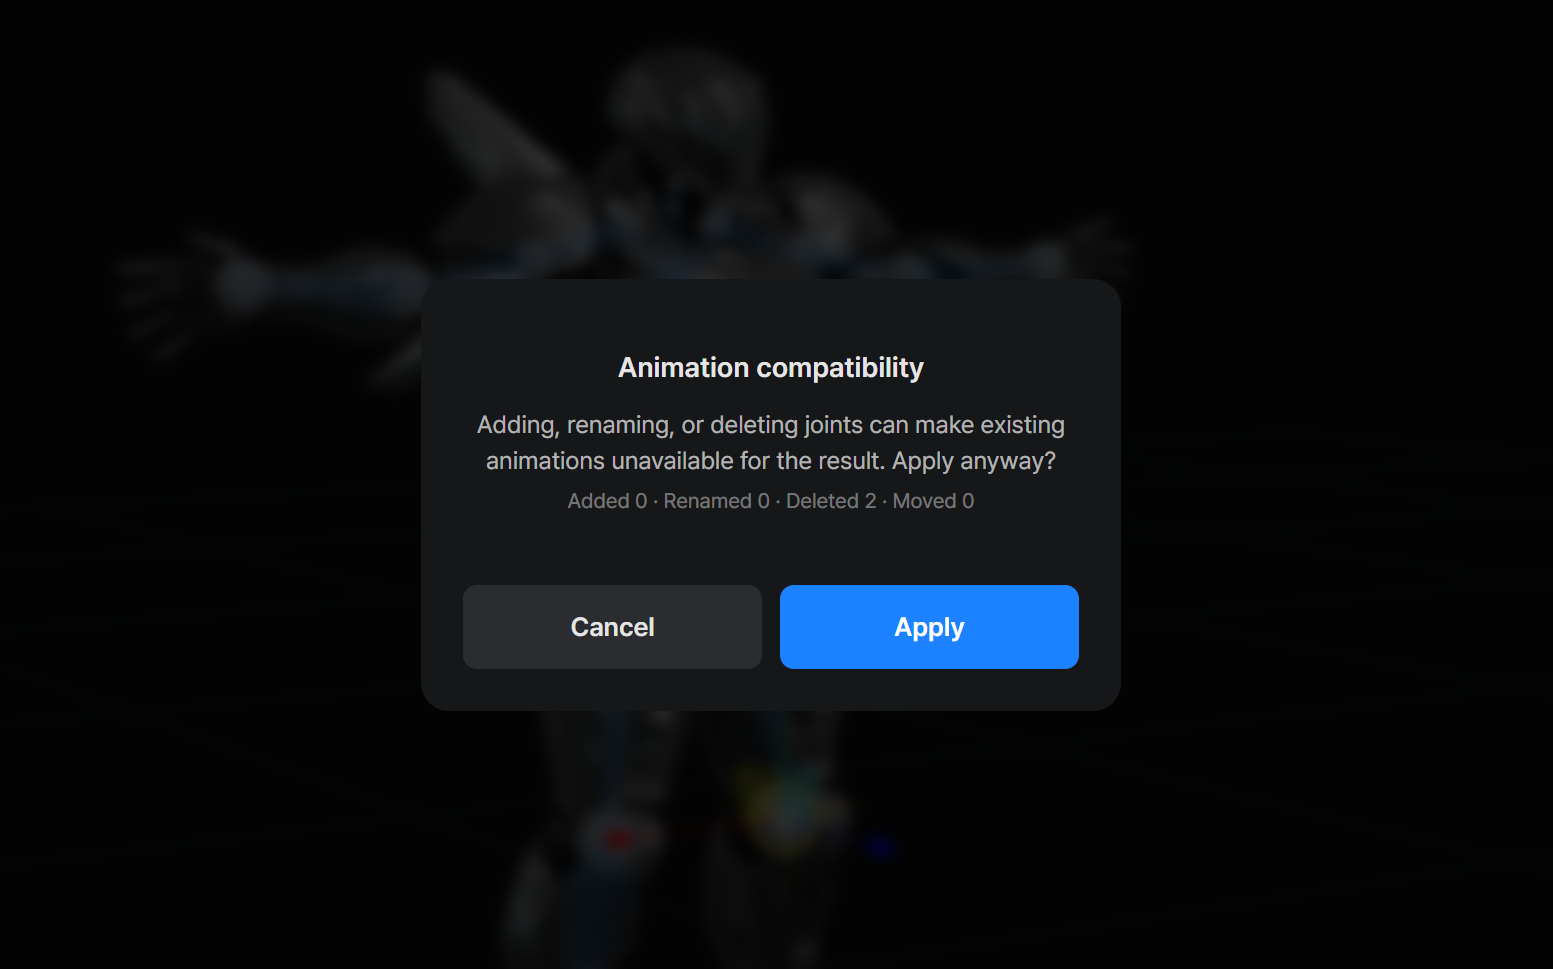
If you add, rename, or delete a joint and then select Apply Rig Edit, the Animation compatibility dialog appears. Review the change summary before continuing. If you plan to use existing animations, verify the joint names and test pose first.
3. Correct skin weights with a brush
If joint placement is correct but an unrelated part of the mesh moves with a pose, inspect the skin weights. For example, if moving the right arm also moves part of the torso or left arm, those vertices are influenced by the wrong joint.
Select Weights mode or press 3.
Select the joint to paint
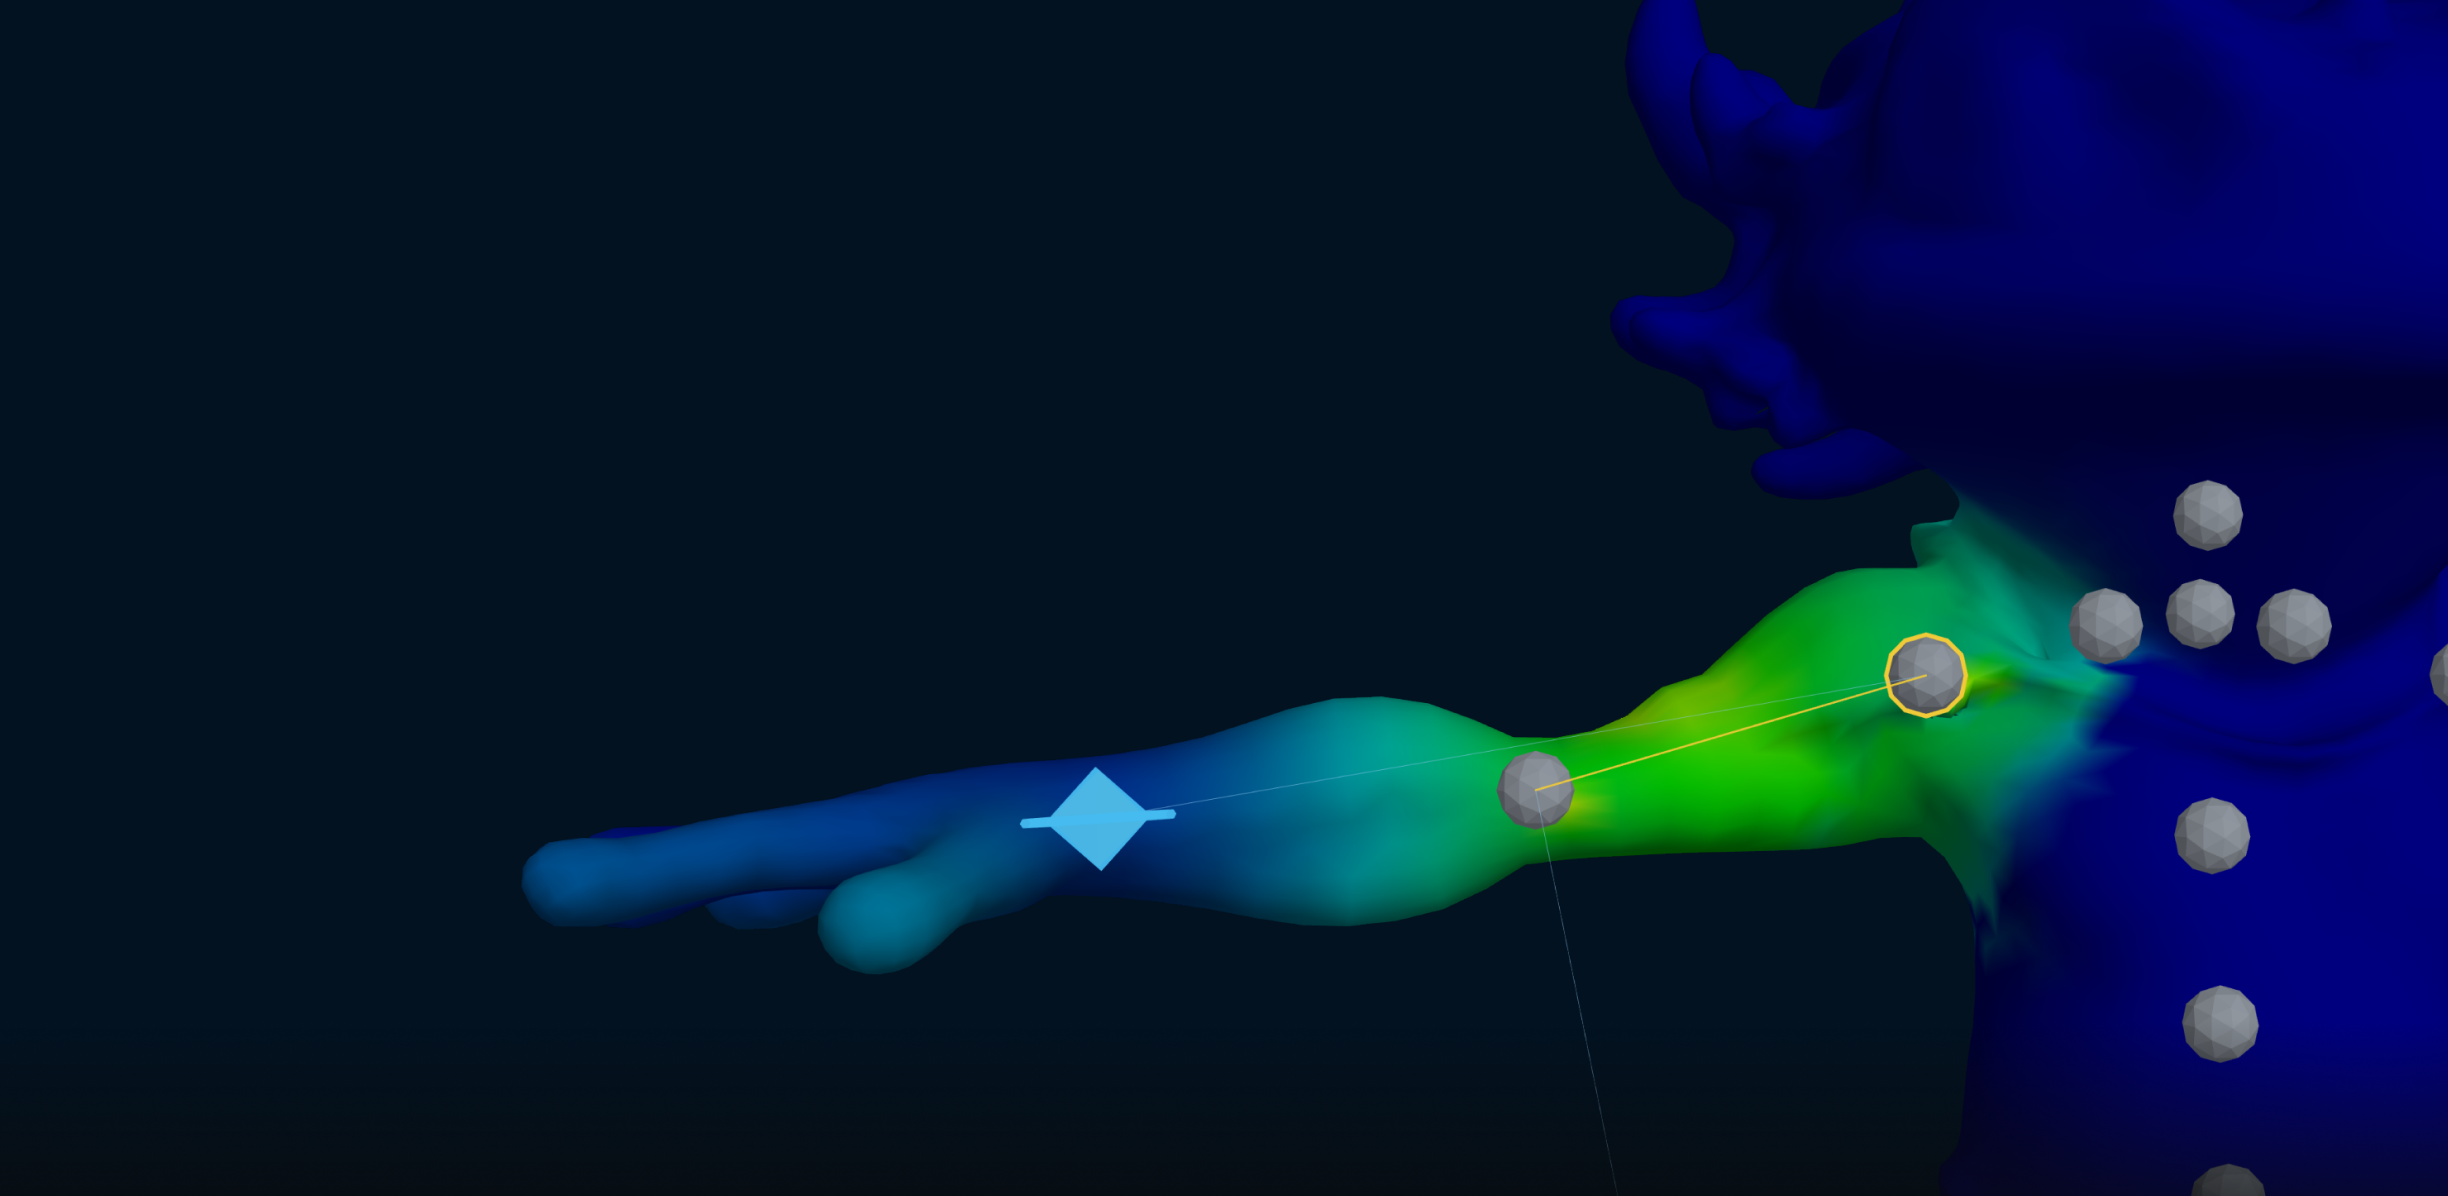
Select a joint from the joint list, or hold Ctrl and click it in the viewport. On macOS, use Cmd+click. A regular click in Weights mode paints the mesh, so use Ctrl/Cmd when selecting a joint directly in the viewport.
After you select a joint, the mesh changes to a heat map. Blue areas have little influence from the selected joint, while red areas have strong influence. Look for high influence in regions the joint should not control.
Choose a brush mode
- Add: Increase the influence of the selected joint.
- Subtract: Reduce the influence of the selected joint.
- Smooth: Soften abrupt changes between neighboring vertices for smoother deformation.
- Set: Move the painted region toward the selected Weight value.
Size controls the brush size on screen. Use the slider, or press [ or ] to decrease or increase it. Strength controls how much one stroke changes the weight. Start with a small brush and low Strength, then build up the correction over several strokes.
Fix a mesh region linked to the wrong joint
- Use a test pose to identify the problematic region.
- Select the joint that has unintended influence over that region.
- Use Subtract to reduce its influence gradually.
- Select the joint that should control the region.
- Use Add or Set to supply the needed influence.
- If the boundary bends too sharply, use Smooth to soften the transition.
- Move the joint again in the test pose and review the result.
You can use the Rest Pose toggle or press Tab in Weights mode to switch between the rest pose and test pose. Painting while posed lets you see how each stroke affects the deformation. To manipulate a joint directly, press G or R to display the pose gizmo again.
Each vertex distributes a normalized total weight across multiple joints. A large change to one joint can change the relative influence of the others, so make small corrections and test the pose frequently.
4. Use Undo and reset controls
Most Rig Editor changes take effect immediately. Use the following controls to recover from mistakes:
- Ctrl/Cmd+Z: Undo the last pose or skeleton action, or the last stroke in the current weight session.
- Ctrl/Cmd+Shift+Z or Ctrl/Cmd+Y: Redo the last undone action.
- Reset Pose: Return only the test pose to the rest pose.
- Reset Skeleton: Revert skeleton edits such as joint transforms, renaming, additions, and deletions.
- Reset Weights: Revert only skin weight painting to its initial state.
- Reset All at the top of the panel: Revert the skeleton edits, weight edits, and test pose from the current session.
Your edited result remains when you switch among Pose, Skeleton, and Weights modes. Leaving Weights mode clears the stroke-by-stroke undo history, so use Reset Weights if you later need to discard all weight edits. Navigating to another asset or page before selecting Apply Rig Edit may show a warning about unapplied changes.
5. Apply the edited rig as a new asset
When you finish editing, return to Pose mode and verify that the original problem is resolved. Move the joint in more than one direction to check that the boundary deforms consistently.
Select Apply Rig Edit at the bottom of the panel. VARCO 3D creates a new asset from the edited rig while keeping the original rigged asset unchanged. The test pose is not saved; only the skeleton and skin weight edits are applied in the rest pose.
If you added, renamed, or deleted a joint, review the animation compatibility warning before applying. After the new asset is ready, test its pose again and apply the animations you plan to use for a final compatibility check.
In the example below, part of the character's wing follows an unintended skeleton joint during animation. Weight Painting can reduce the influence of the wrong joint and add influence from the correct joint so the wing follows the intended part of the rig.
Troubleshooting
Skeleton or Weights mode is locked
Skeleton editing and Weight Painting are unavailable on the Free plan. You must also select a completed RIG, AI_RIG, or EDIT_RIG result asset. Rig Editor is not available on mobile because its gizmos and brushes require precise pointer input.
The weight brush is disabled
Select a joint before painting. Click its name in the joint list, or use Ctrl/Cmd+click in the viewport. The brush ring appears when you move the pointer over the mesh after selecting a joint.
Apply Rig Edit is disabled after changing only the pose
The pose is for review and is not saved. Edit the skeleton or skin weights to create changes that can be applied.
Existing animations are unavailable after editing
Check whether you renamed or deleted a joint required by the animation profile. If you already applied the edit, reopen the original rigged asset, edit it again while preserving the standard joint names, and apply the corrected result.