[Custom Workflow Series] Understanding Nodes: Input Nodes and Action Nodes
2026-07-06 · tutorial
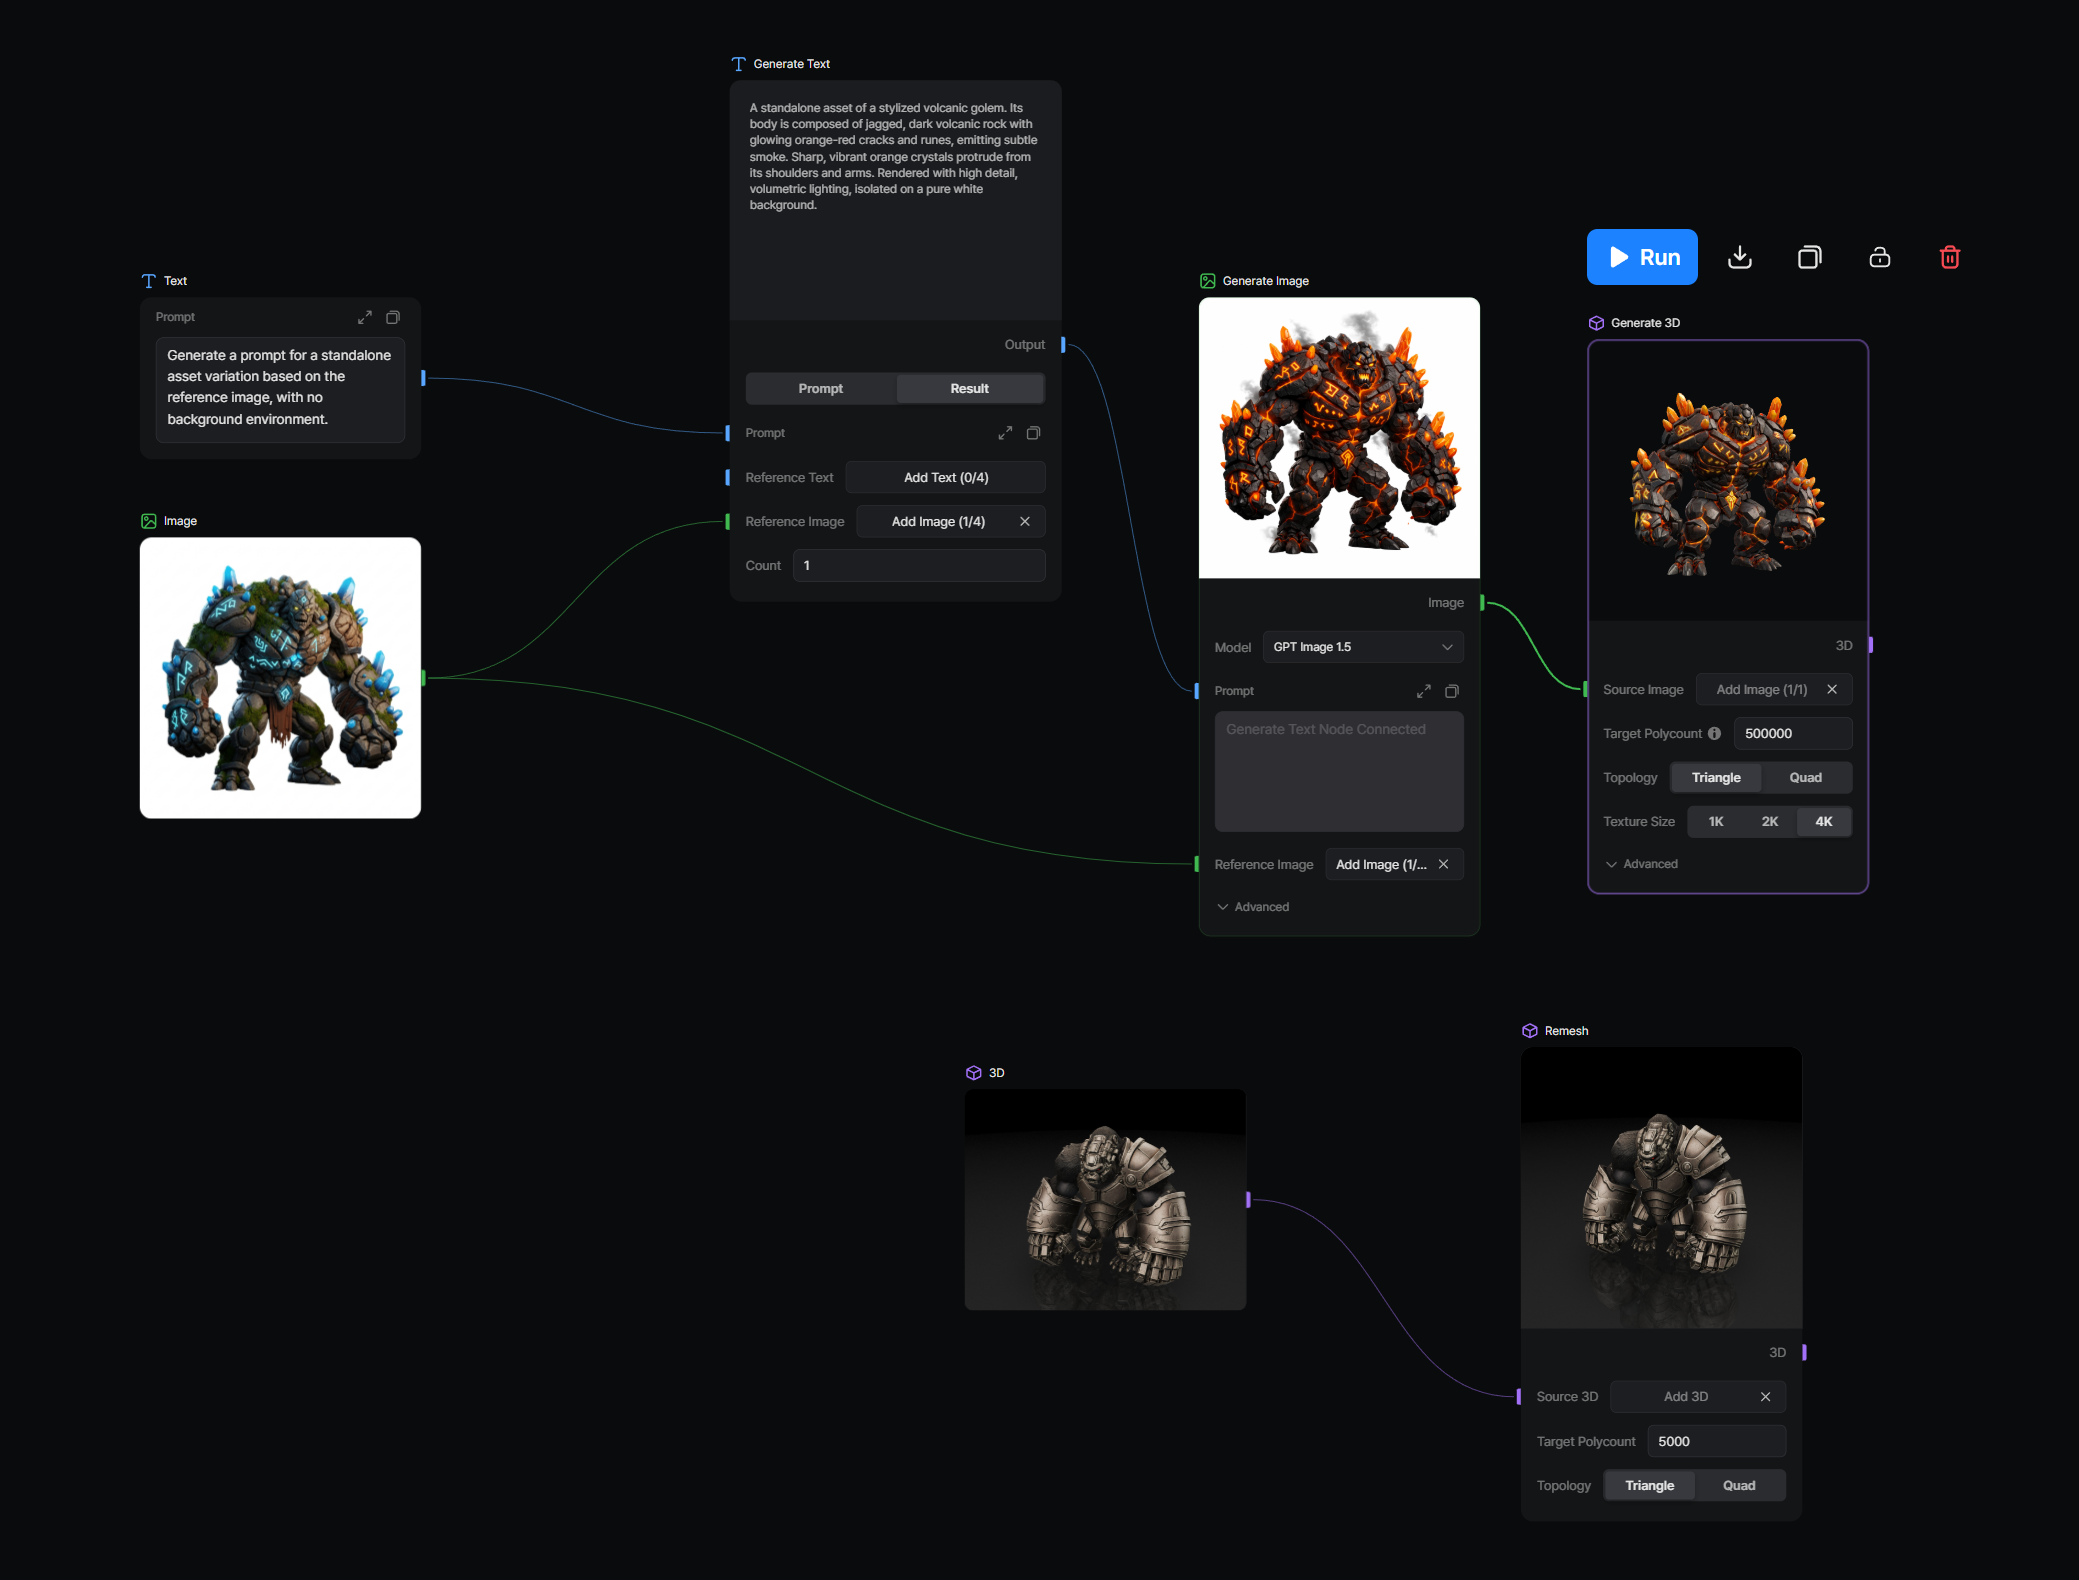
In the first article, we introduced Custom Workflow as a way to connect repeatable creation steps into one reusable pipeline.
Now let’s look at the building blocks that make Custom Workflow work: nodes.
A Custom Workflow is made by placing nodes on a canvas and connecting them together. Each node has a specific role. Some nodes hold the inputs you want to use. Other nodes perform an action, such as generating text, creating an image, producing a 3D model, remeshing a result, or applying PBR processing.
Once you understand how nodes work, Custom Workflow becomes much easier to use.
Why Custom Workflow Uses Nodes
AI-assisted 3D creation is not always a straight line.
Sometimes you start from text. Sometimes you start from an image. Sometimes you already have a 3D model and only want to refine it. Sometimes you want to generate several image candidates first, then turn the best ones into 3D assets.
A fixed step-by-step interface can be simple, but it can also become limiting.
Nodes give you more flexibility.
With nodes, you can build a workflow that matches your own creative process. You can keep inputs in one place, connect results to the next step, reuse previous outputs, and rerun only the parts you want to improve.
What Is a Node?
A node is one step in your workflow.
Each node appears as a block on the canvas. Depending on the node type, it may contain input fields, settings, result previews, or connection points.
In Custom Workflow, there are two main kinds of nodes:
- Input Nodes
- Action Nodes
Input Nodes store values you provide directly, such as text, an image, or a 3D model.
Action Nodes use inputs to produce new results. For example, Generate Text can turn a rough idea into a more detailed prompt, Generate Image can create images from text, and Generate 3D can create a 3D model from an image.
Input Nodes
Input Nodes are where you place source material for your workflow.
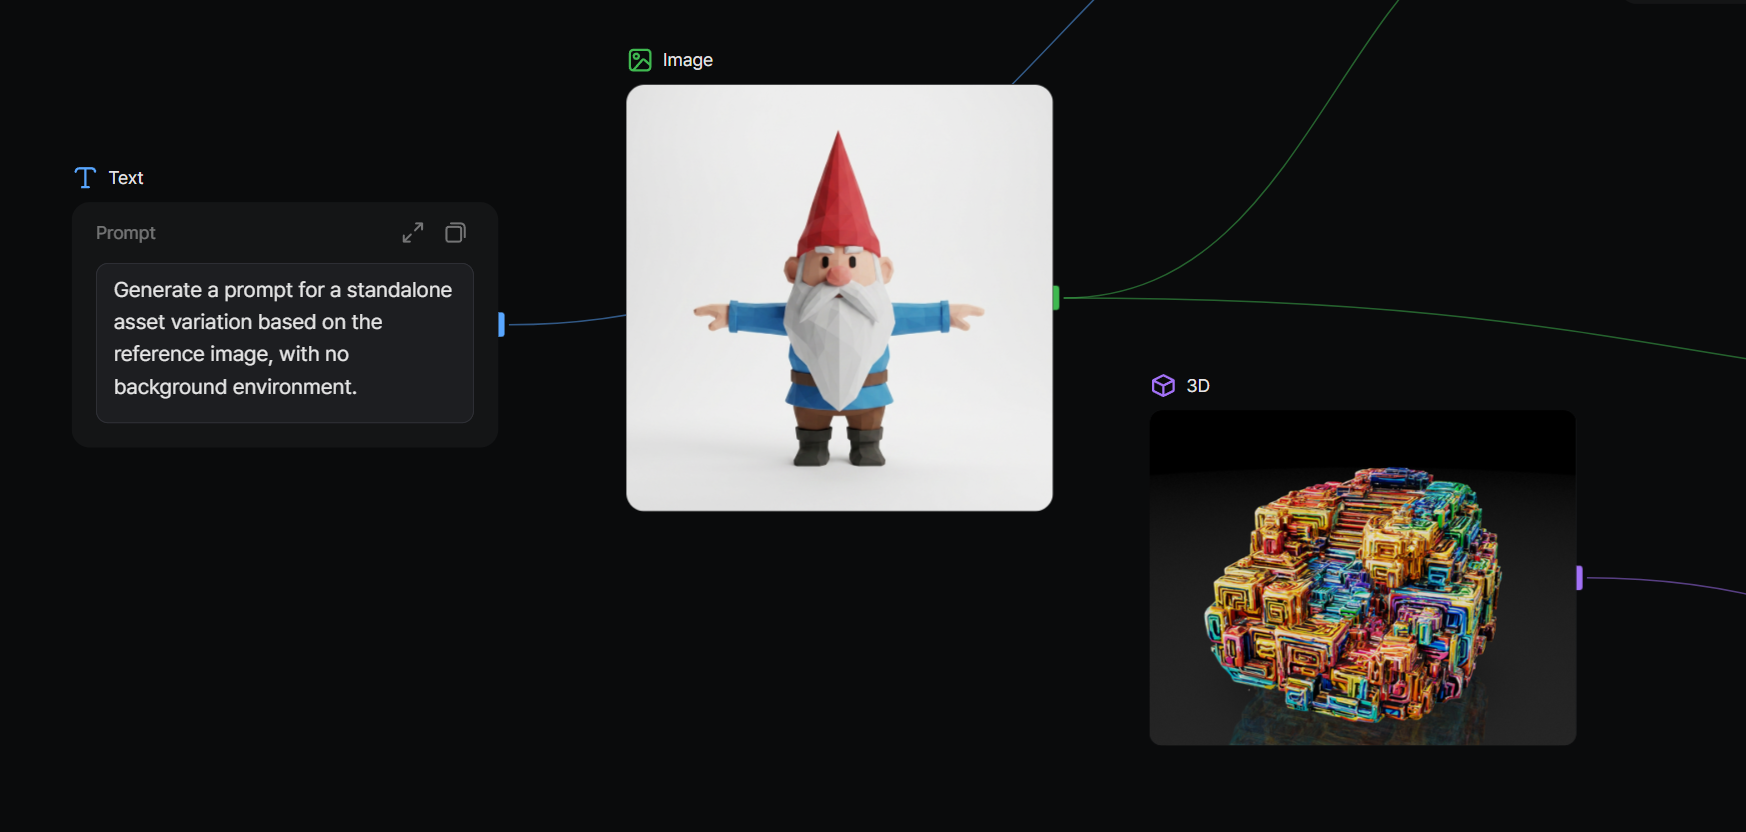
They do not run an AI generation task by themselves. Instead, they provide values that other nodes can use.
Text Input
A Text Input node stores text.
You can use it for a simple idea, a prompt, a style direction, a product description, or any written instruction you want to pass into another node.
For example:
A small fantasy potion shop with wooden shelves, glowing bottles, and a cozy handcrafted style.
This text can then be connected to Generate Text or Generate Image.
Image Input
An Image Input node stores an image.
You can use it when you already have a concept image, sketch, product photo, style reference, or generated image that you want to use as part of the workflow.
An Image Input can be connected to nodes that accept image input, such as Generate 3D.
3D Input
A 3D Input node stores a 3D model.
This is useful when you already have a 3D asset and want to continue processing it inside Custom Workflow.
For example, you can connect a 3D Input node to Remesh or PBR to refine an existing model.
Action Nodes
Action Nodes are the nodes that actually perform work.
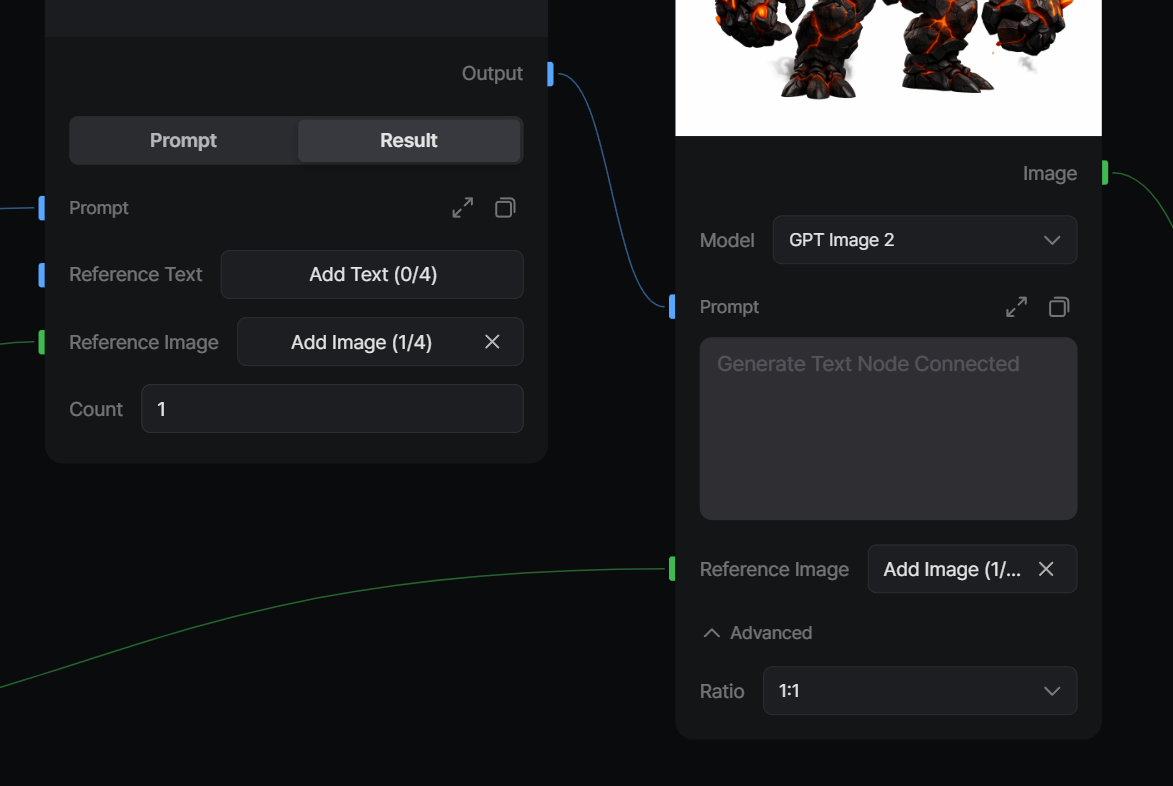
They take input values, call VARCO 3D’s creation tools, and produce new results.
Custom Workflow currently includes the following Action Nodes.
Generate Text
Generate Text helps turn an initial idea into more useful text.
You can use it to expand a short concept, rewrite a prompt, create several directions, or make a description more suitable for image generation.
For example, you might start with:
A cute robot gardener
Generate Text can help turn that into a more detailed prompt with materials, shape language, style, and visual details.
Generate Image
Generate Image creates images from text.
It can use a prompt from a Text Input node, a result from Generate Text, or text written directly inside the node.
Generate Image is often used before Generate 3D because a strong image can give the 3D generation step a clearer visual direction.
Generate 3D
Generate 3D creates a 3D model from an image.
This image can come from an Image Input node or from a Generate Image node. If multiple images are connected, Generate 3D can create multiple 3D candidates from those results.
This is one of the most important nodes in a typical Custom Workflow.
Remesh
Remesh refines the structure of a 3D model.
After a 3D model is generated, you may want a cleaner mesh or a different topology target depending on how you plan to use the asset.
Remesh helps prepare the model for more practical downstream use.
PBR
PBR applies material processing to a 3D model.
This helps make the asset more useful in real-time 3D environments, game engines, and production workflows where physically based materials are expected.
How Connections Work
Nodes become powerful when you connect them.
A connection sends the output of one node into the input of another node.
For example:
Text Input -> Generate Text -> Generate Image -> Generate 3D
In this workflow, the text you write in Text Input is passed to Generate Text. The result from Generate Text is passed to Generate Image. The images from Generate Image are passed to Generate 3D.
The connection defines the flow of data.
Instead of manually copying a prompt, downloading an image, and uploading it again, you can let the workflow carry the result forward.
Required Inputs and Reference Inputs
Action Nodes can have different kinds of inputs.
The two most important concepts are Required Inputs and Reference Inputs.
Required Inputs
A Required Input is the main input a node needs in order to run.
For example:
- Generate Image requires text.
- Generate 3D requires an image.
- Remesh requires a 3D model.
- PBR requires a 3D model.
If the Required Input is empty, the node cannot run.
Required Inputs also affect how many results a node creates. If a connected upstream node provides multiple values, the downstream node can run once for each value.
Reference Inputs
A Reference Input provides extra guidance.
It does not determine the main number of runs in the same way a Required Input does. Instead, it helps guide the result.
For example, Generate Image may use reference images to keep a visual direction, style, object shape, or design language consistent.
Reference Inputs are especially useful when you want variation, but still want the results to stay close to a particular visual direction.
Direct Inputs vs Connected Inputs
Many Action Nodes can receive values in two ways.
You can type or upload a value directly inside the node, or you can connect another node to provide that value.
If a connection is present, the connected value is used.
This makes workflows flexible. You can first test a node by typing directly into it, then later connect it to an upstream node when you want a more structured pipeline.
For example, you can write a prompt directly inside Generate Image. Later, you can connect Generate Text to that same input. When connected, Generate Image will use the text from Generate Text instead.
What Happens When You Disconnect a Node?
Disconnecting a node does not automatically erase the direct input you had written inside the node.
This is intentional.
If you typed a prompt directly into Generate Image, then connected Generate Text to it, the connected value takes priority. But if you later remove that connection, the original direct input can be used again.
This lets you experiment with connections without losing your previous setup.
You can think of direct input as the node’s own saved value, and connected input as a value temporarily supplied by the workflow.
Key Concepts to Remember
Custom Workflow becomes much easier once you remember these ideas:
- Input Nodes store source values.
- Action Nodes create new results.
- Connections pass outputs from one node into another.
- Required Inputs are necessary for a node to run.
- Reference Inputs guide the result without becoming the main input.
- Connected inputs take priority over direct inputs.
- Disconnecting a node brings back the direct input that was already saved.
- Each Action Node keeps its latest result inside the workflow.
These concepts are the foundation of Custom Workflow.
Once you understand them, you can start building workflows that are more flexible than a single fixed generation path.
What Comes Next
In this article, we looked at the basic structure of Custom Workflow: Input Nodes, Action Nodes, connections, Required Inputs, Reference Inputs, and direct inputs.
In the next article, we will build a simple workflow from start to finish.
We will start with a text idea, use Generate Text to refine it, create images with Generate Image, turn those images into 3D models with Generate 3D, and then refine the result with Remesh and PBR.
By the end of the next article, you will have a clear example of how these nodes work together in a real workflow.