[Custom Workflow Series] Introducing Custom Workflow: Turn Repeatable Creation Steps into a Connected Pipeline
2026-06-30 · announcement
Creating a 3D asset rarely ends with a single generation.
Most of the time, the process is more exploratory. You start with an idea, turn it into a prompt, generate a few images, choose the most promising direction, convert it into a 3D model, refine the mesh, adjust the material, and sometimes go back to an earlier step to try a different variation.
That exploration is an essential part of creative work. But when every step is handled separately, the process can quickly become repetitive and hard to manage.
That is why we built Custom Workflow for VARCO 3D.
Custom Workflow is a node-based creation tool that lets you connect multiple generation steps into one reusable workflow. It helps you explore variations, preserve intermediate results, and rerun only the parts you want to improve.
What Is Custom Workflow?
Custom Workflow lets you build your own 3D creation pipeline by connecting text, images, 3D models, and AI-powered actions as a node graph.
For example, you can create a workflow like this:
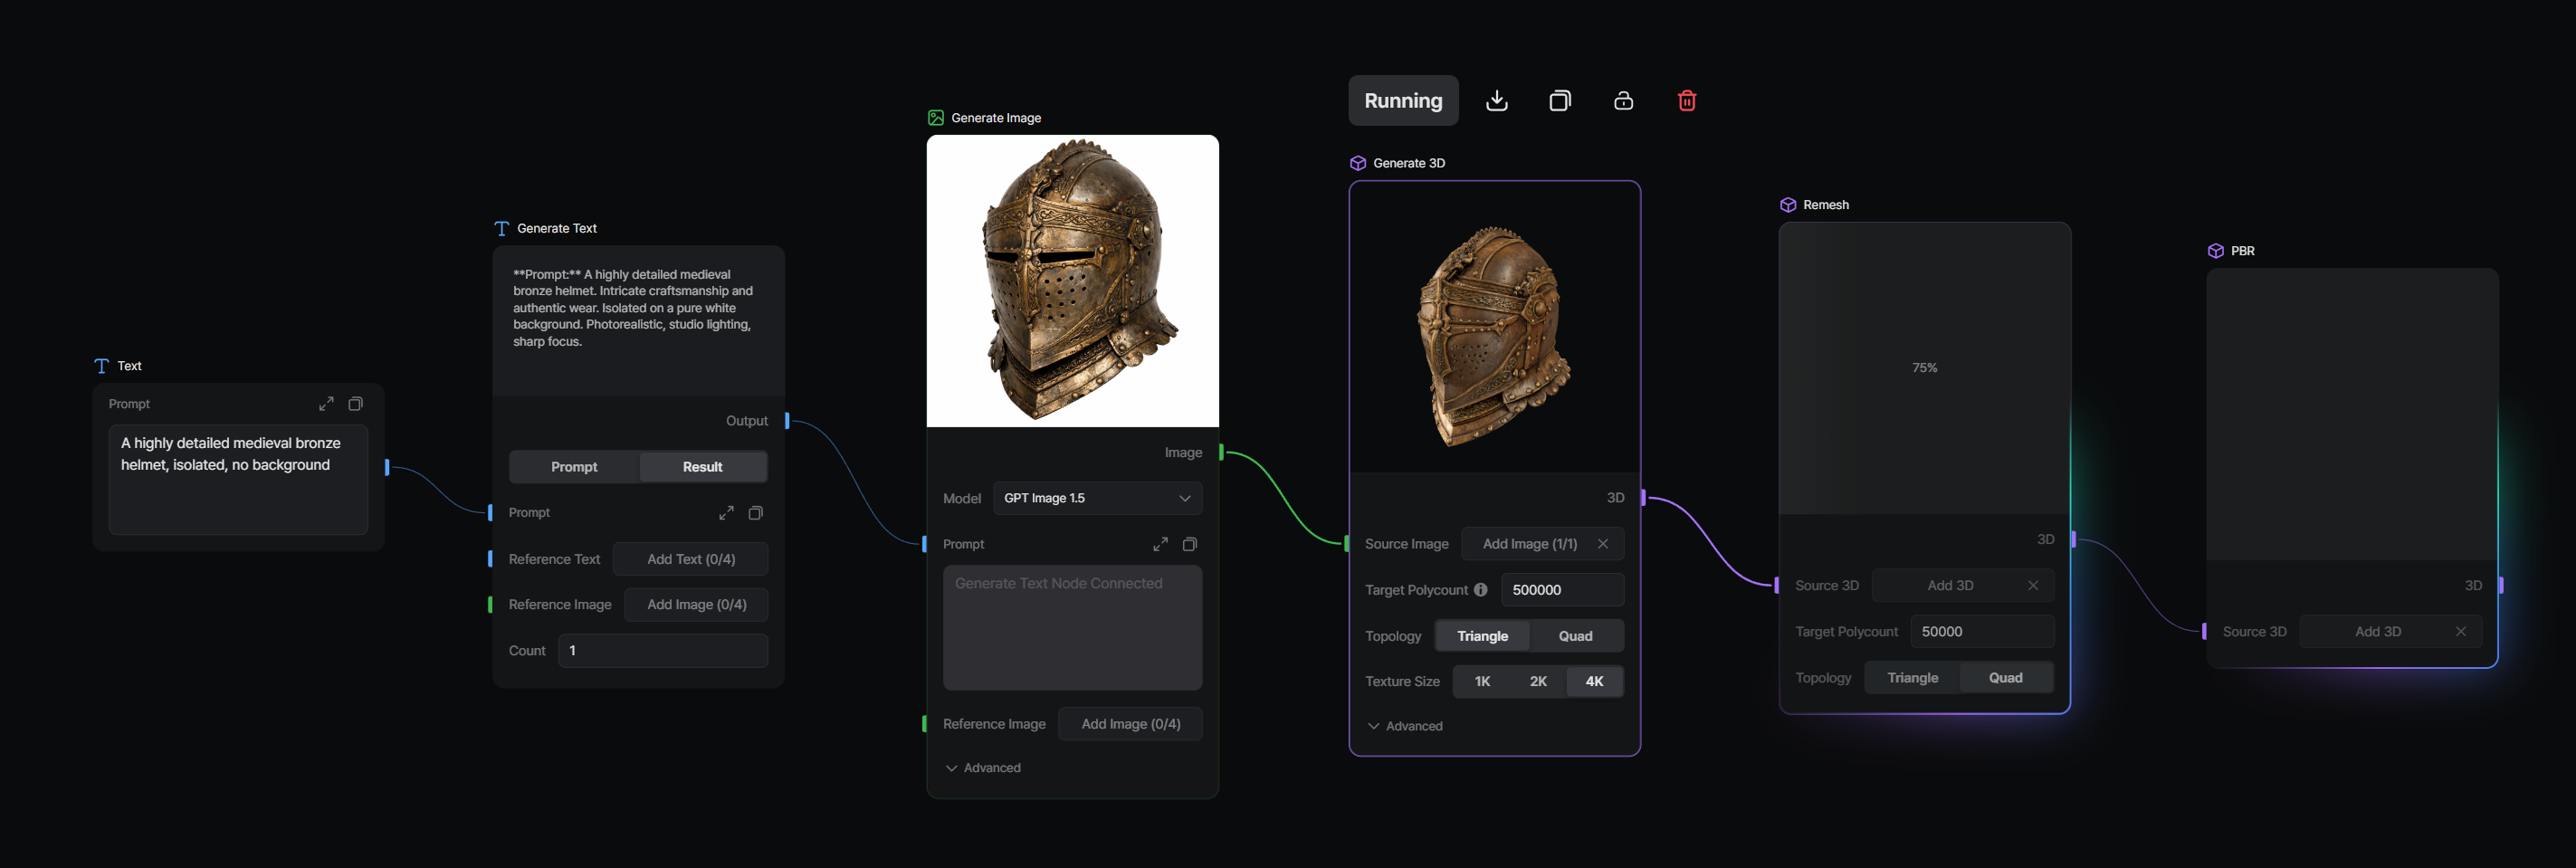
This example starts from a text input, improves the idea with Generate Text, generates images, creates 3D models, and then refines the results with Remesh and PBR.
Each step exists as an individual node. Each node can keep its own input values, parameters, and latest results. This means you do not always need to restart the entire process from the beginning.
If you like the generated image but want to try a different 3D result, you can rerun only the Generate 3D node. If the 3D model looks good but the mesh needs refinement, you can rerun only the Remesh step.
Custom Workflow gives you more control over how you move forward, step back, and explore alternatives.
Why We Built It
One of the most important parts of AI-assisted 3D creation is not getting the perfect result on the first try.
It is being able to explore good options quickly.
The same prompt can lead to different results. One image may have a stronger silhouette. Another may have better surface detail. Another may simply be better suited for 3D conversion.
Before Custom Workflow, these attempts were often scattered across separate tasks. You might generate an image, download or save it, upload it again, generate a 3D model, then repeat the process with a slightly different prompt. After several rounds, it becomes difficult to remember which input produced which result.
Custom Workflow brings that process into one connected workspace.
You can see how your idea, reference images, generated images, 3D models, and refinement steps are connected. The workflow itself becomes a map of your creative process.
What Problems Does It Solve?
Exploring variations is easier
3D asset creation often requires multiple candidates.
You may want to create several versions of a fantasy shop, a sci-fi drone, a stylized weapon, a creature, or a product prototype before choosing the best direction.
Custom Workflow is designed for that kind of iteration. Instead of treating every attempt as a disconnected task, you can build a repeatable flow and generate multiple variations from the same idea.
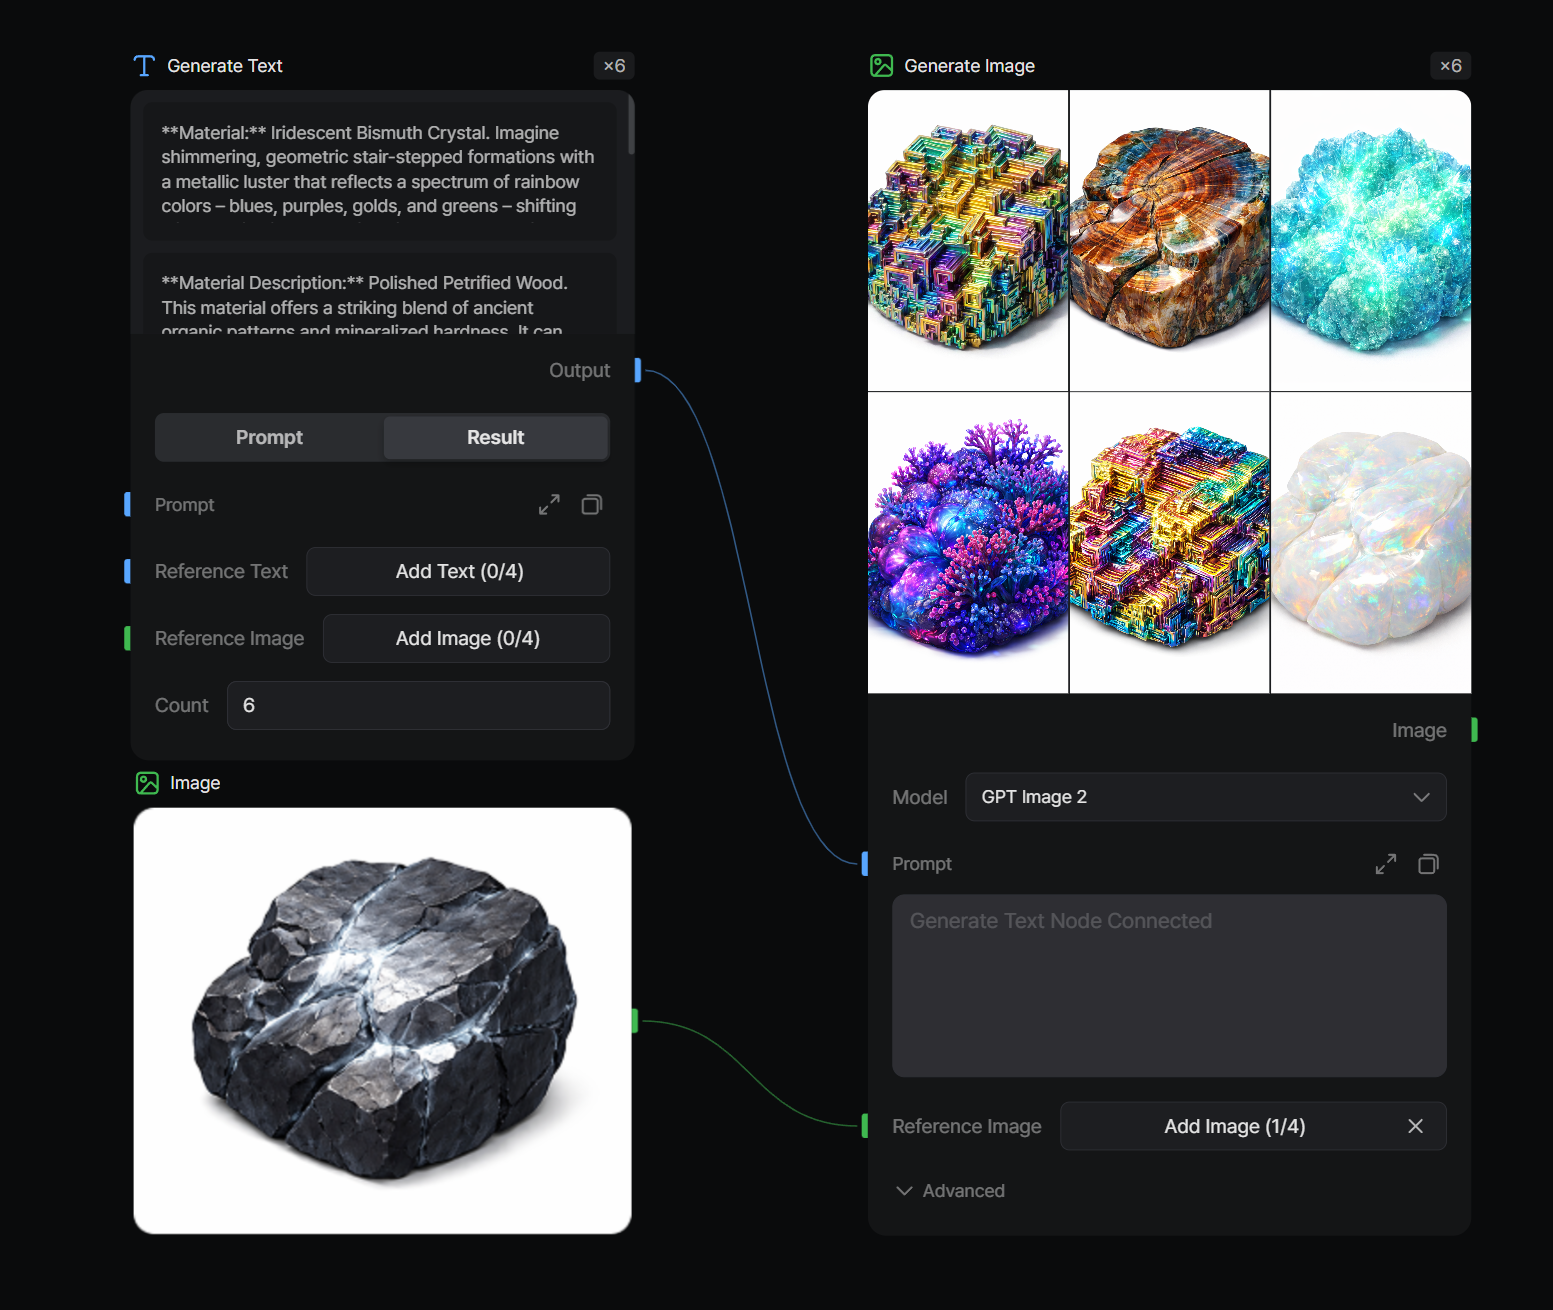
Intermediate results are easier to reuse
Sometimes one part of the process works well, while another needs another attempt.
Maybe the image is perfect, but the 3D result needs to be regenerated. Maybe the 3D model is good, but you want to try different remesh settings. Maybe you want to keep the same reference image while testing several prompt variations.
Because Custom Workflow keeps node results as part of the workflow state, you can reuse previous outputs without manually rebuilding the entire chain.
The creation process becomes easier to understand
When a project involves many generations, it can be hard to track how each result was made.
Custom Workflow makes the structure visible. Nodes and connections show the relationship between inputs and outputs. You are not just looking at final assets. You are also looking at the path that produced them.
That makes it easier to revisit, adjust, and improve your work.
What Can You Do with Custom Workflow?
Custom Workflow is more than a way to run several steps in order. It is a flexible canvas for building your own creation process.
You can use it to:
- Connect multiple AI creation steps in one workflow
- Store text, image, and 3D inputs
- Use Generate Text, Generate Image, Generate 3D, Remesh, and PBR nodes together
- Preserve the latest result of each action node
- Rerun only selected parts of a workflow
- Create multiple variations from the same concept
- Compare different results more easily
- Continue from a useful intermediate result instead of starting over
In short, Custom Workflow helps you make the creative process more structured, reusable, and efficient.
Who Is It For?
Users who want to explore many options
If you often create multiple candidates before choosing one, Custom Workflow can help you move faster.
You can keep the same concept, generate different visual directions, and continue with the results that look most promising.
Users who want to reduce repetitive work
If you find yourself repeating the same sequence of steps, such as writing a prompt, generating an image, uploading it again, and converting it to 3D, Custom Workflow can turn that sequence into a reusable pipeline.
Once the workflow is set up, you can focus more on adjusting the creative direction and less on repeating manual steps.
Users who want to manage the full creation process
Custom Workflow is useful when you care not only about the final result, but also about how that result was made.
Because the workflow shows the relationship between each step, it becomes easier to understand, refine, and reuse your process.
Example Workflows
Create a 3D model from text
Start with a text idea, improve it with Generate Text, generate an image, and then convert that image into a 3D model.
Text Input -> Generate Text -> Generate Image -> Generate 3D
Create a 3D model from an image reference
Use an existing image as the input and generate a 3D model from it.
Image Input -> Generate 3D
Generate multiple image candidates before creating 3D
Use a prompt to generate several image options, then continue into 3D generation with the results you want to explore.
Text Input -> Generate Image -> Generate 3D
Refine a generated 3D model
After generating a 3D model, clean up the mesh and apply PBR material processing.
Generate 3D -> Remesh -> PBR
The Biggest Benefit: You Can Keep Iterating
The biggest strength of Custom Workflow is that it does not treat creation as a single one-time result.
AI-assisted creation is naturally iterative. The first output does not have to be final. You can find a promising direction, then continue from that point.
If the prompt needs improvement, go back and adjust it.
If the image is good but the 3D model needs another attempt, rerun the 3D step.
If the model is good but the mesh needs refinement, rerun Remesh.
If you want to explore more candidates, generate more variations.
Custom Workflow is built around this loop.
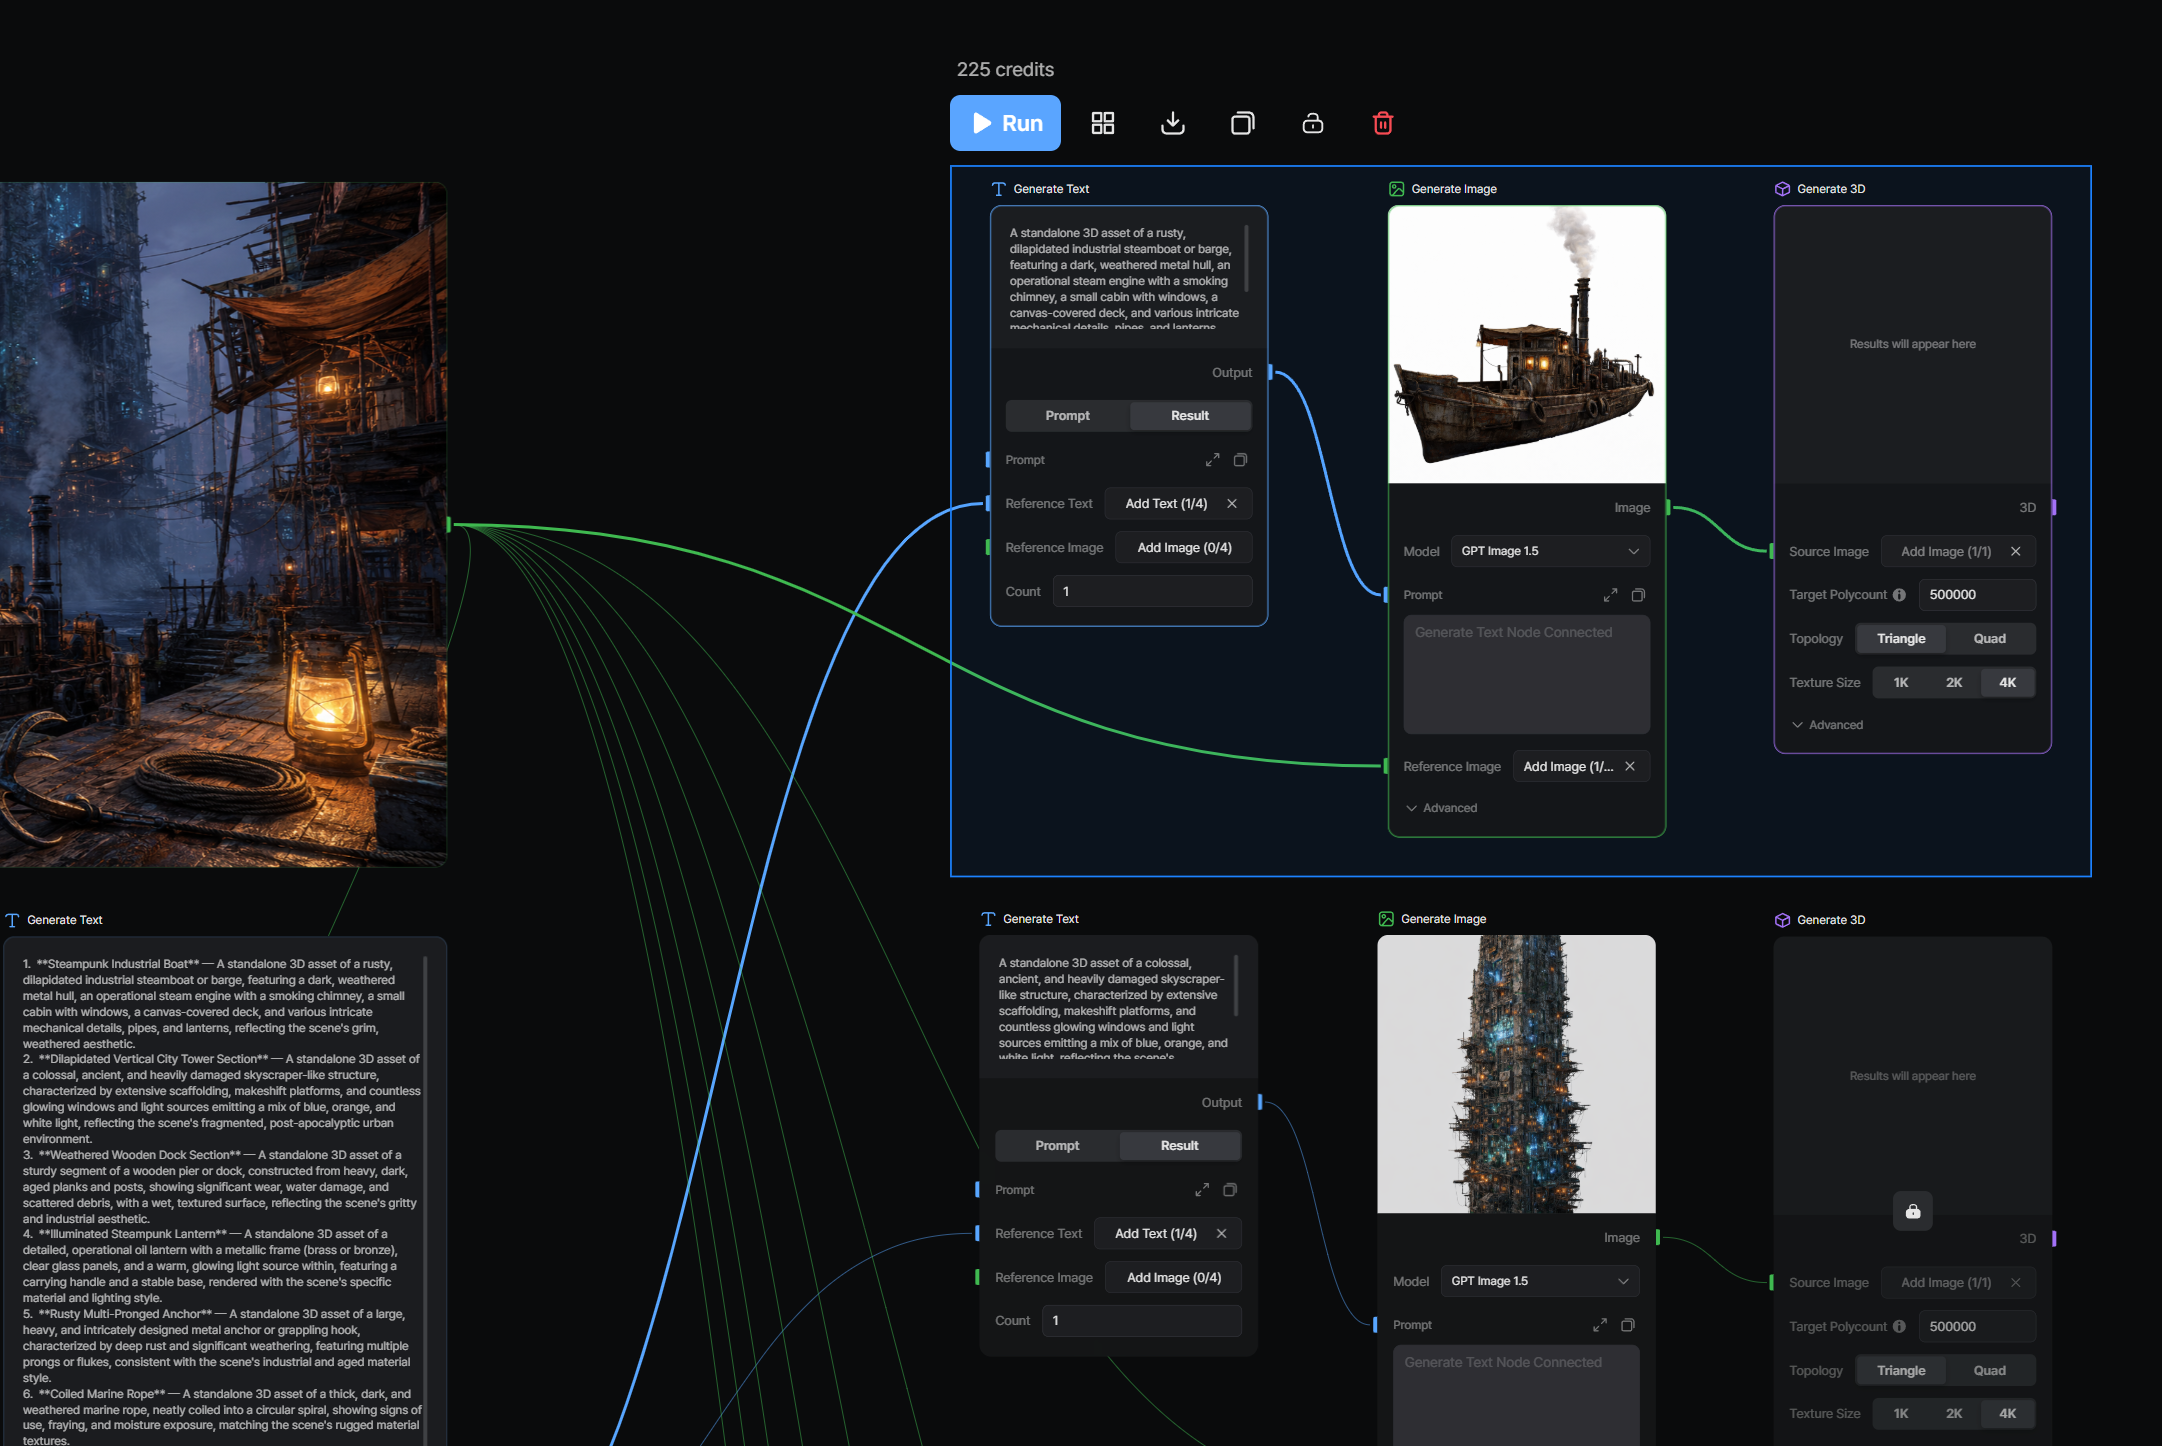
It is not only a tool for producing final assets. It is also a tool for managing the creative path that leads to them.
What Comes Next
In this article, we introduced why Custom Workflow exists, what problems it solves, and how it changes the way you can create 3D assets in VARCO 3D.
In the next article, we will look at the core building blocks of Custom Workflow: Input Nodes and Action Nodes.
We will explain what each node does, how connections work, what Required Inputs and Reference Inputs mean, and how Custom Workflow decides which values to use when a node has both direct inputs and connected inputs.
Understanding nodes is the key to using Custom Workflow well. Once you understand the basic structure, you can start building workflows that match your own creative process.