VARCO 3D Bridge for Unreal
2026-03-19 · tutorial
This guide explains how to install and get started with the VARCO 3D Bridge for Unreal.
With the bridge plugin, you can move your workflow from VARCO 3D Studio into Unreal Engine more smoothly and reduce manual setup along the way.
The process is simple:
- Download the Unreal bridge plugin from VARCO 3D Studio
- Install the plugin into your Unreal project or the engine itself
- Enable the plugin in Unreal Editor
- Connect Unreal to VARCO 3D Studio
- Export your assets from VARCO 3D Studio to Unreal
Installation
Step 1. Download the Unreal bridge plugin from VARCO 3D Studio
In VARCO 3D Studio, click the Bridge button to open the bridge popup. From there, locate Unreal in the list of available integrations and click Install to download the Unreal bridge plugin.
Make sure to choose the plugin build that matches your Unreal Engine version. The bridge currently supports Unreal Engine 5.4, 5.5, 5.6, 5.7, and 5.8.
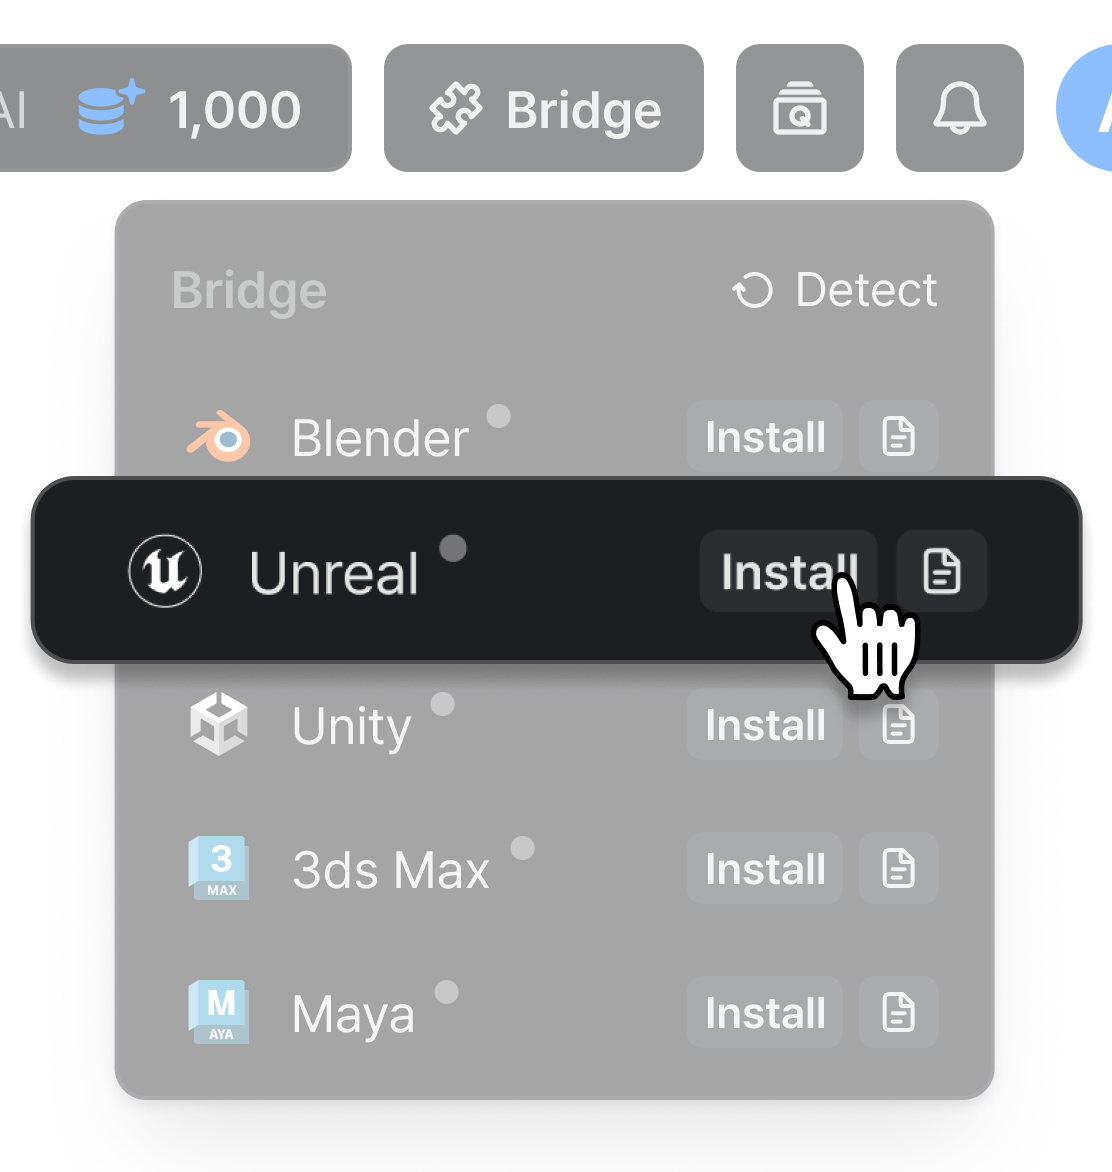
The Install button downloads the build for the latest Unreal Engine version (currently UE 5.8). If you need a different version, use the direct downloads below:
- Unreal Engine 5.7 — VARCO3DPlugin-1.1.1-Win64-UE5.7.zip
- Unreal Engine 5.6 — VARCO3DPlugin-1.1.1-Win64-UE5.6.zip
- Unreal Engine 5.5 — VARCO3DPlugin-1.1.1-Win64-UE5.5.zip
- Unreal Engine 5.4 — VARCO3DPlugin-1.1.1-Win64-UE5.4.zip
Step 2. Choose an installation method
You can install the bridge plugin in one of two ways. Pick whichever fits your workflow best.
Option A. Install to a specific Unreal project
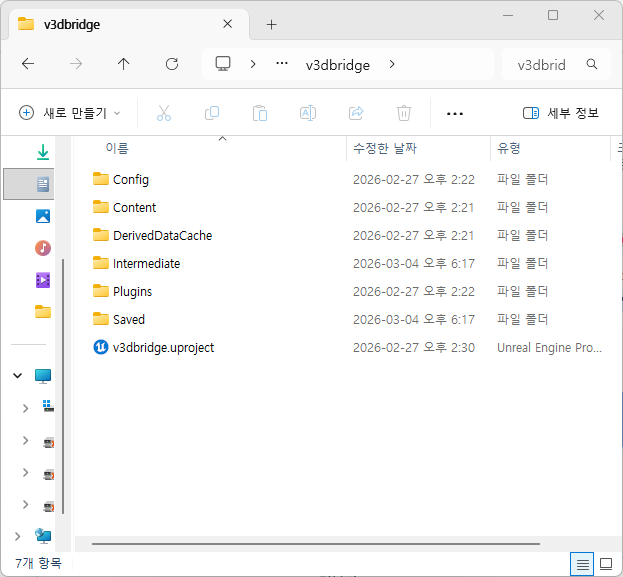
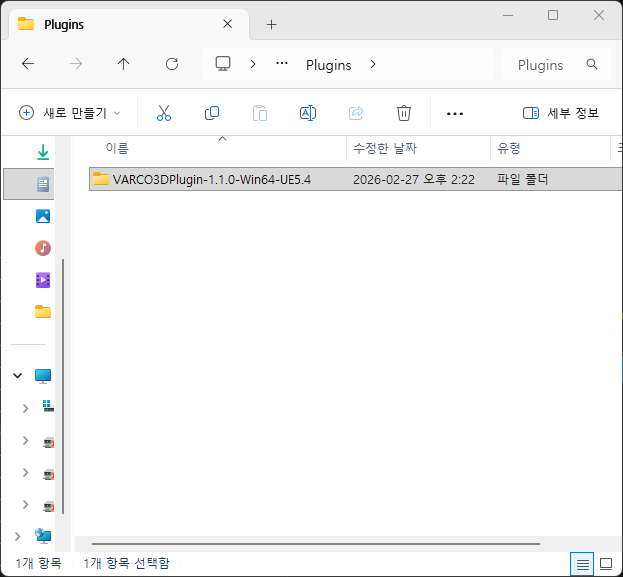
Open your Unreal project folder and create a Plugins folder at the project root if it does not already exist. Then extract the downloaded plugin ZIP into this Plugins folder.
This method keeps the plugin scoped to that single project.
Option B. Install to the Unreal Engine itself
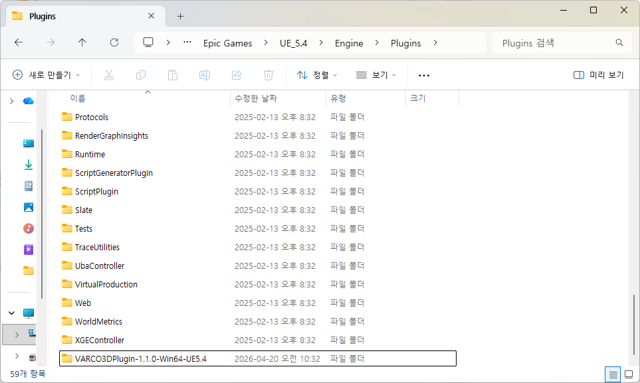
Extract the downloaded plugin ZIP into the engine's Plugins folder. The engine will then load the plugin for any project that uses this engine version.
- Windows:
C:\Program Files\Epic Games\{UE_5.x}\Engine\Plugins - Mac:
/Users/Shared/Epic Games/{UE_5.x}/Engine/Plugins
Step 3. Enable the VARCO 3D Bridge plugin in Unreal Editor
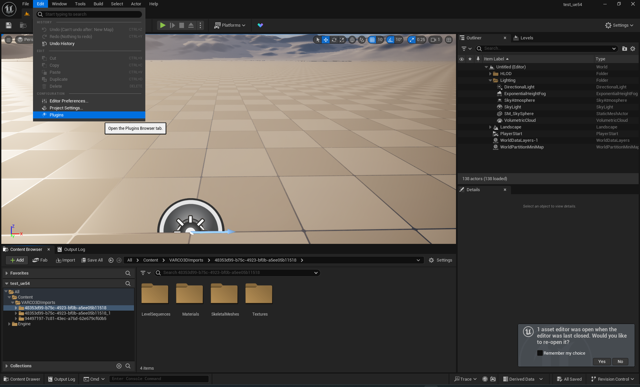
Launch Unreal Editor, then go to Edit > Plugins.
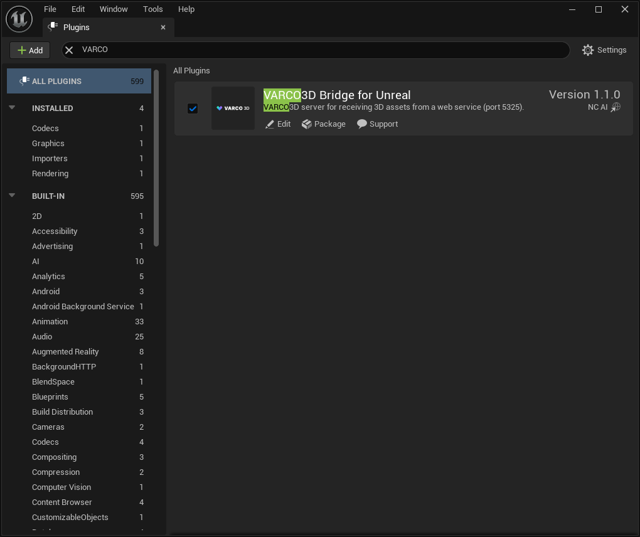
Search for VARCO3D Bridge for Unreal in the plugin list and turn it on. You may be asked to restart the editor before the plugin becomes active.
Usage
Step 1. Click the VARCO3D icon in the main toolbar
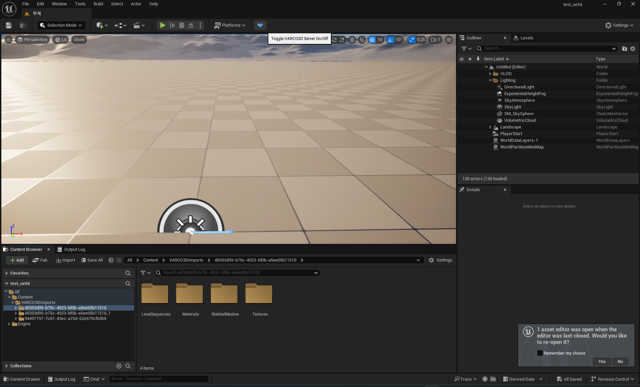
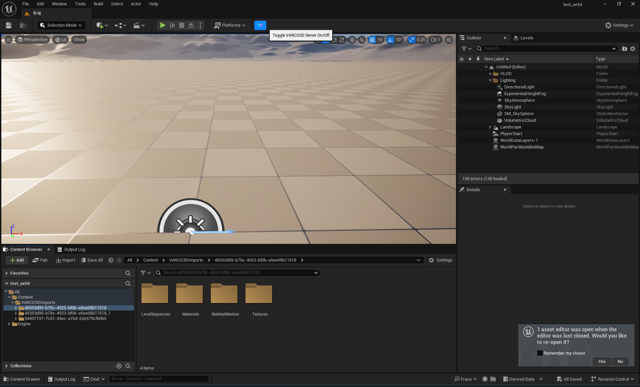
After the editor restarts, look for the VARCO3D icon in the main toolbar of Unreal Editor. Click it to start the local bridge and connect Unreal to VARCO 3D Studio.
When the bridge becomes active, the icon switches to its On state. Make sure this change is visible in Unreal before moving to the next step.
Step 2. Confirm the connection status in Studio
Return to VARCO 3D Studio and open the Bridge popup.
When the connection is detected successfully, the status dot in the popup will turn green. This indicates that Unreal is connected and ready to receive data from VARCO 3D Studio.
If the dot does not turn green, click Detect in the bridge popup to refresh and check the connection again before proceeding.
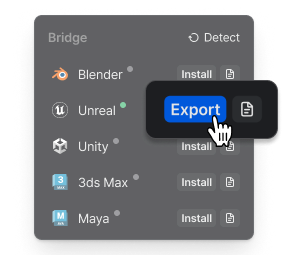
Step 3. Export your VARCO 3D assets to Unreal
Once the connection is detected, the Export button will become available in the bridge popup.
Click Export to send your assets directly to Unreal through the bridge. This makes it easier to continue your workflow in Unreal without going through extra manual import steps.

Step 4. Confirm the imported assets in Content/VARCO3DImports
After the export completes, open your Unreal project's Content Browser and go to Content/VARCO3DImports.
This is where the bridge places the assets it received from VARCO 3D Studio. You can drag them into your scene, refine them, or start using them in your level right away.
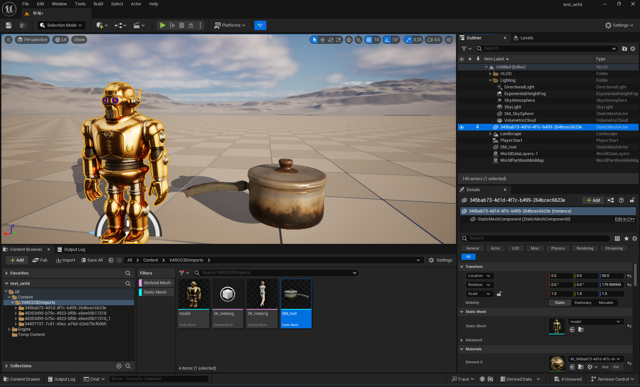
You're all set to continue your workflow in Unreal. Enjoy creating with VARCO 3D.