VARCO 3D Bridge for Maya
2026-03-19 · tutorial
This guide explains how to install and get started with the VARCO 3D Bridge for Maya.
With the bridge plugin, you can move your workflow from VARCO 3D Studio into Maya more smoothly and reduce manual setup along the way.
The process is simple:
- Download the Maya bridge plugin from VARCO 3D Studio
- Run the installer to add the plugin to Maya
- Activate the VARCO3D plugin in the Plug-in Manager
- Confirm the VARCO3D menu has been added to Maya
- Connect to VARCO 3D Studio from the VARCO3D menu
- Export your assets from VARCO 3D Studio to Maya
Installation
Step 1. Download the Maya bridge plugin from VARCO 3D Studio
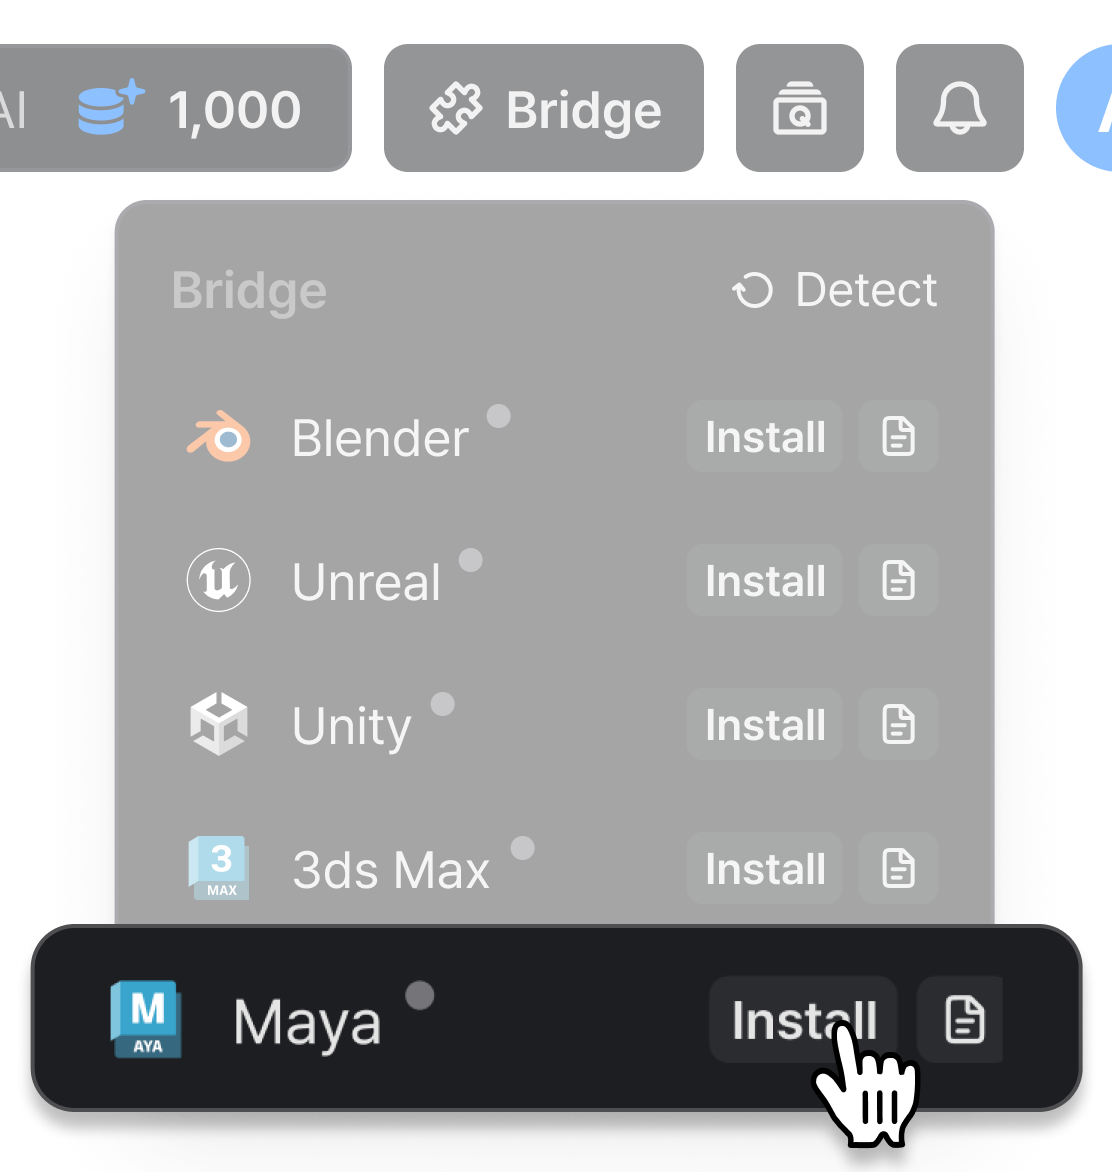
In VARCO 3D Studio, click the Bridge button to open the bridge popup. From there, locate Maya in the list of available integrations and click Install to download the Maya bridge plugin.
Step 2. Run the bridge plugin installer
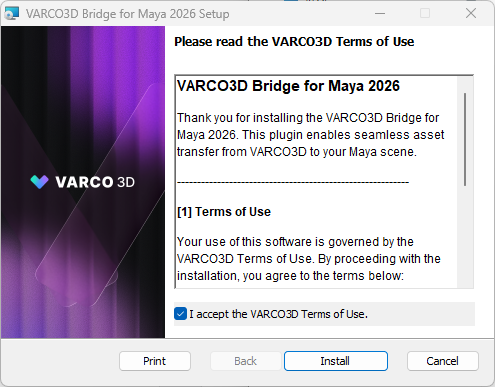
Locate the downloaded VARCO3D-Bridge-for-Maya-2026-v1.1.0.msi file and run it.
Follow the installer prompts to complete the installation.
Step 3. Activate the VARCO3D plugin in the Plug-in Manager
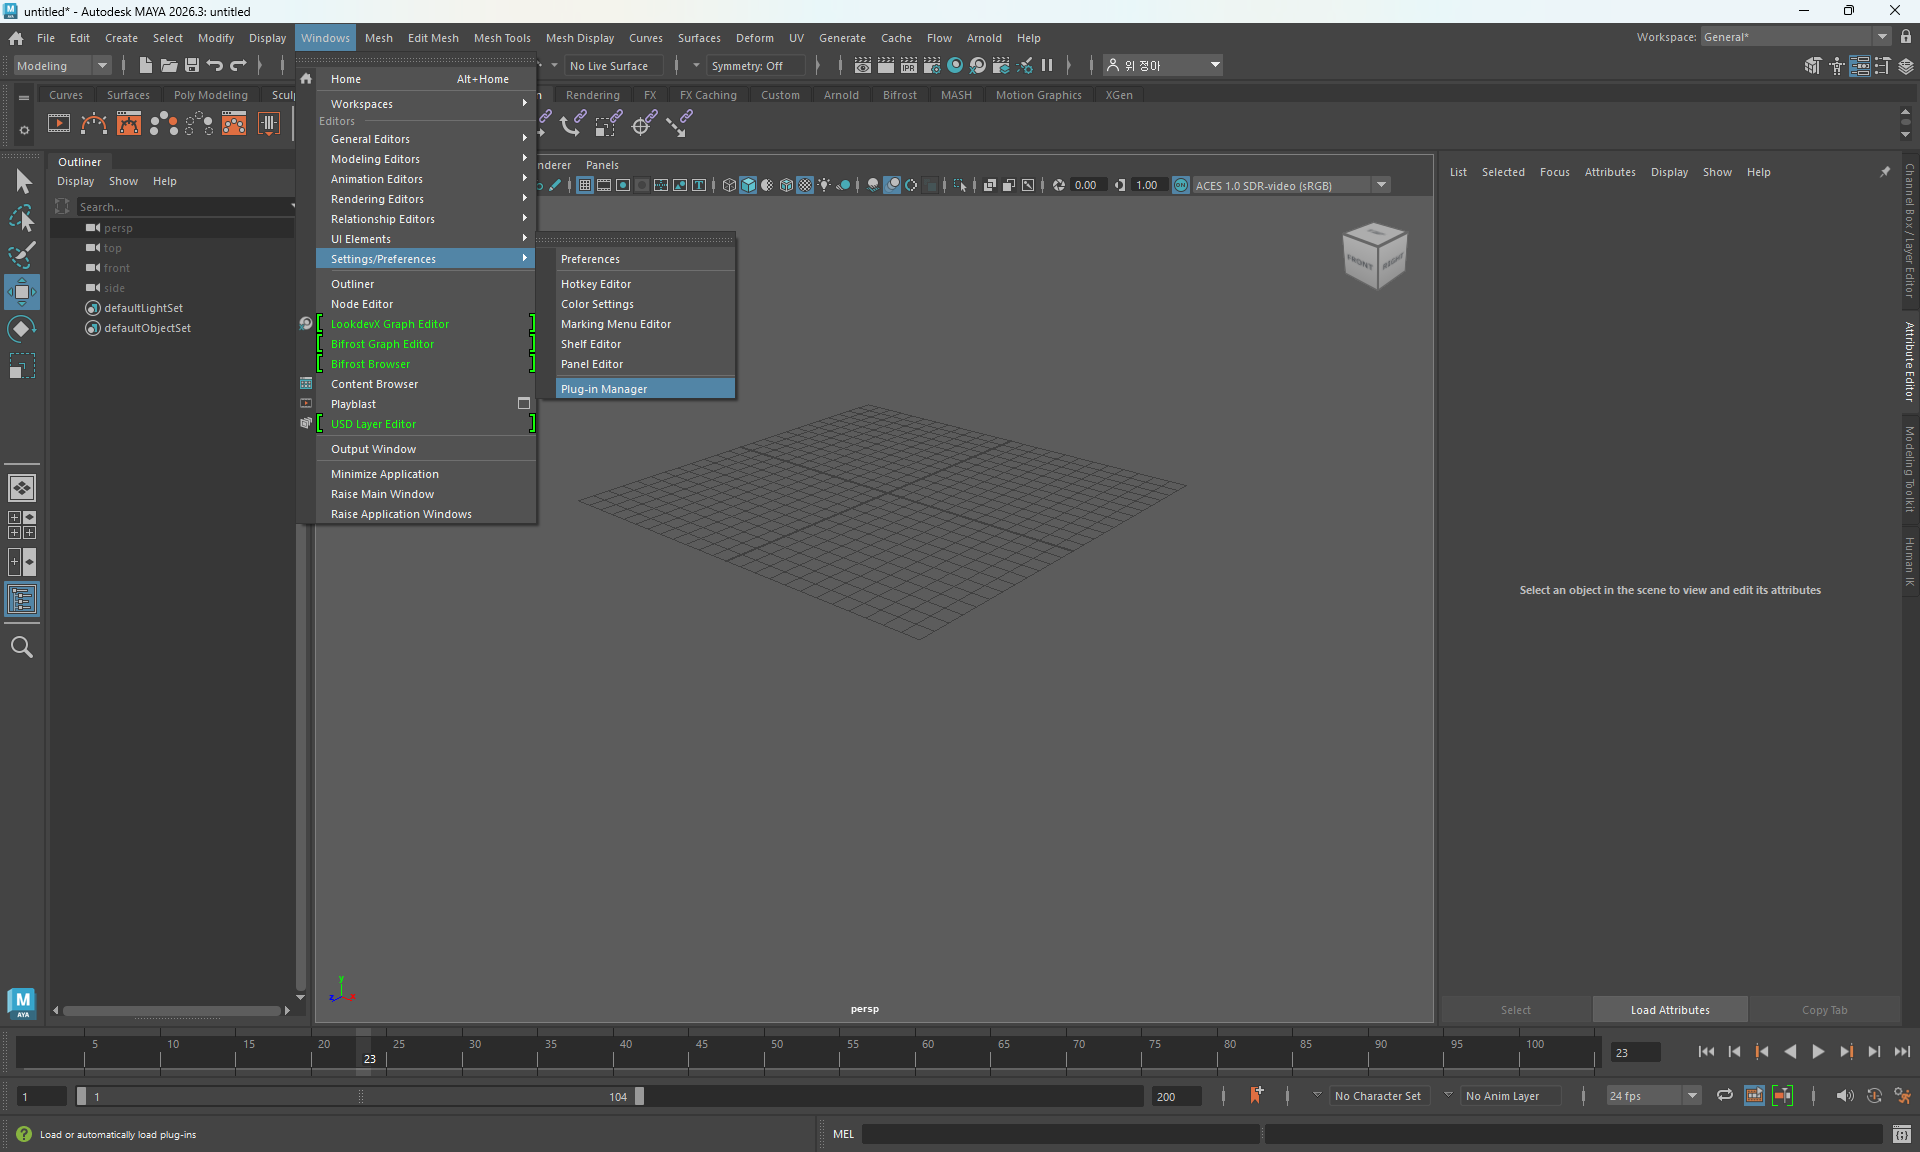
Launch Maya, then go to Windows > Settings/Preferences > Plug-in Manager.
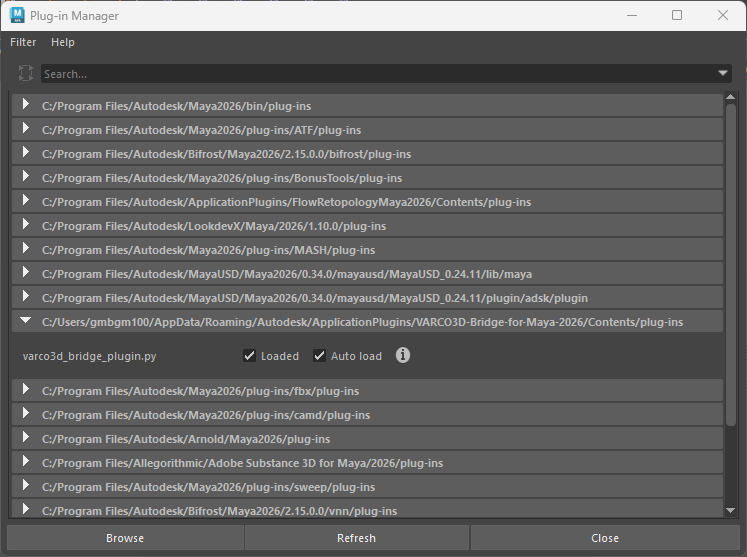
Find the VARCO3D entry and check Loaded to activate the plugin. If you want the plugin to be loaded automatically every time Maya starts, also check Auto load.
Step 4. Confirm the VARCO3D menu appears in Maya
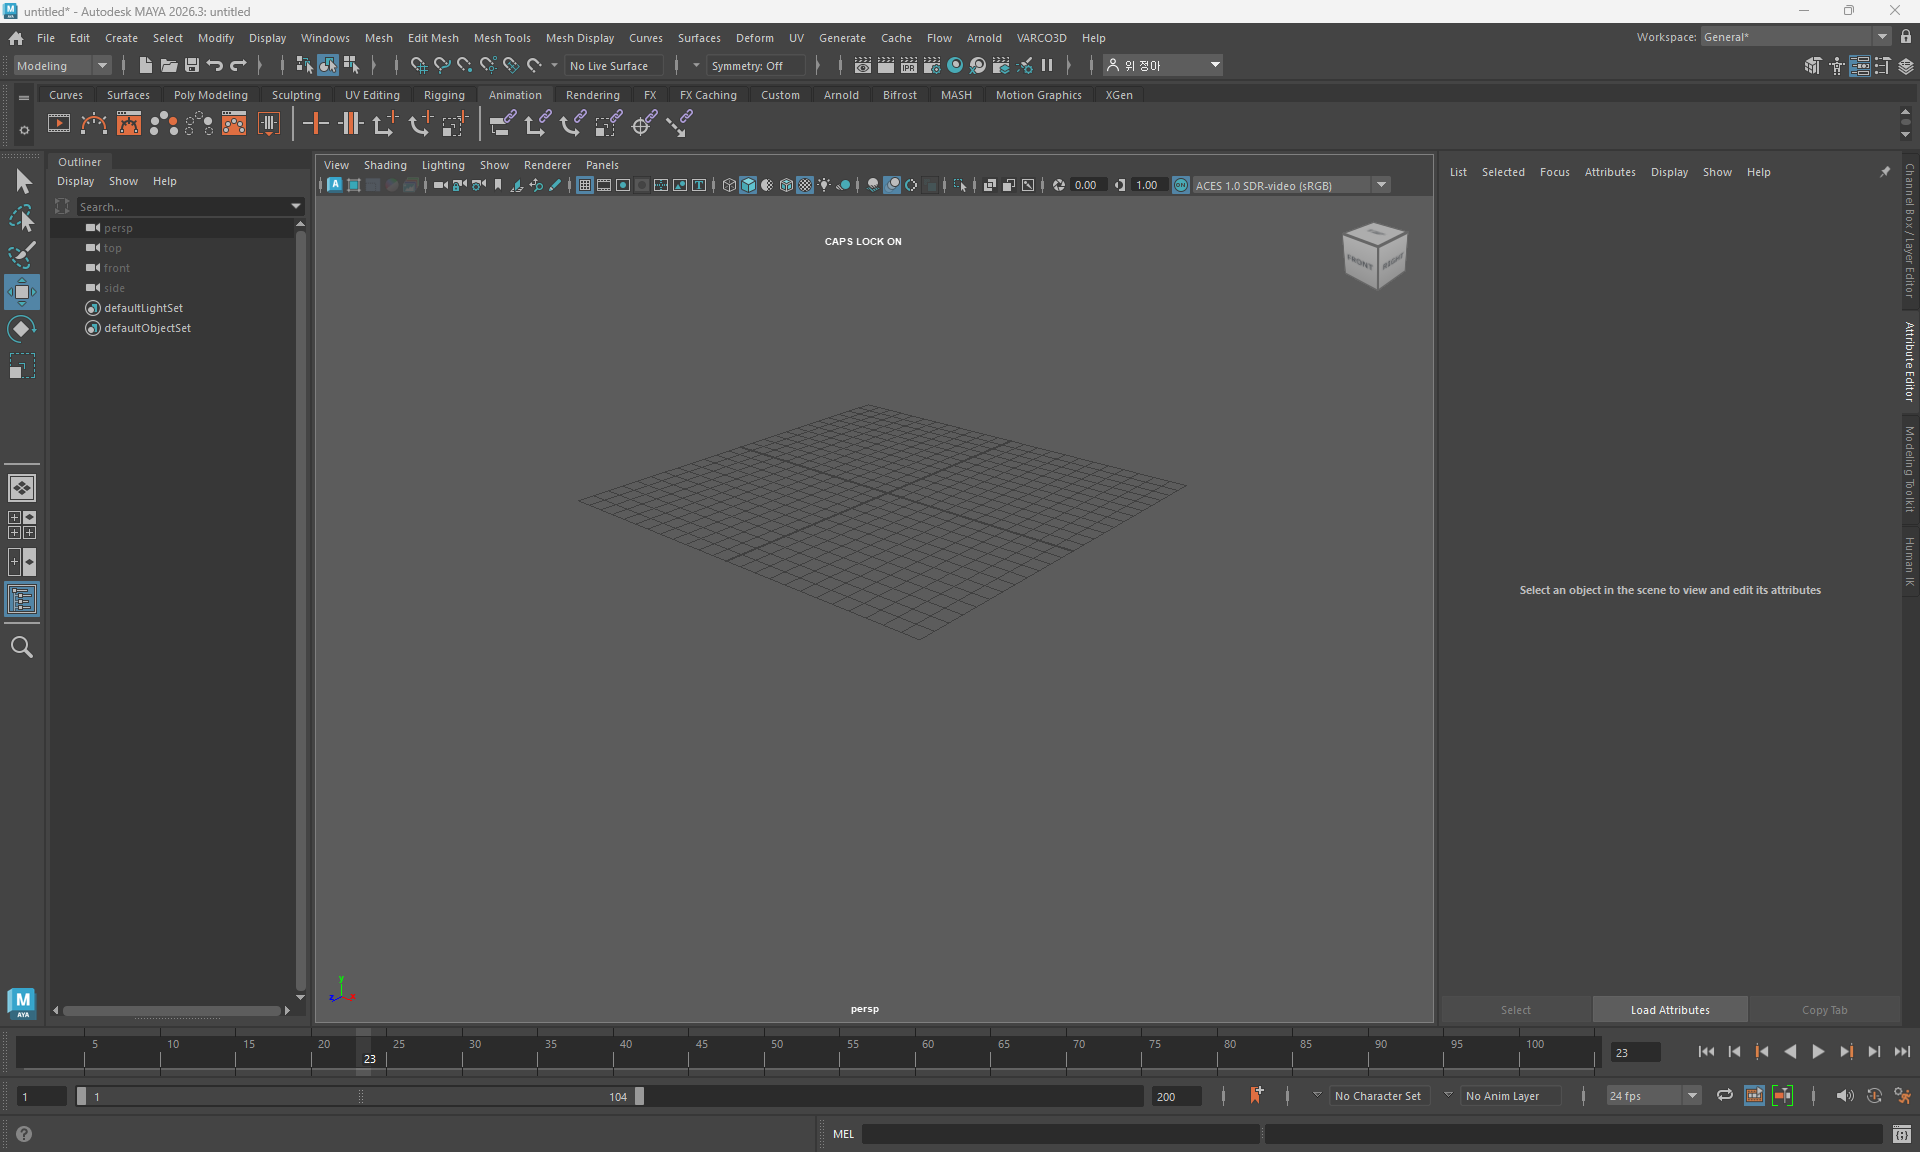
After activating the plugin, confirm that the VARCO3D menu has been added to the top menu bar in Maya.
If the menu is visible, the plugin was installed successfully and is ready to use.
Usage
Step 1. Connect to VARCO 3D Studio
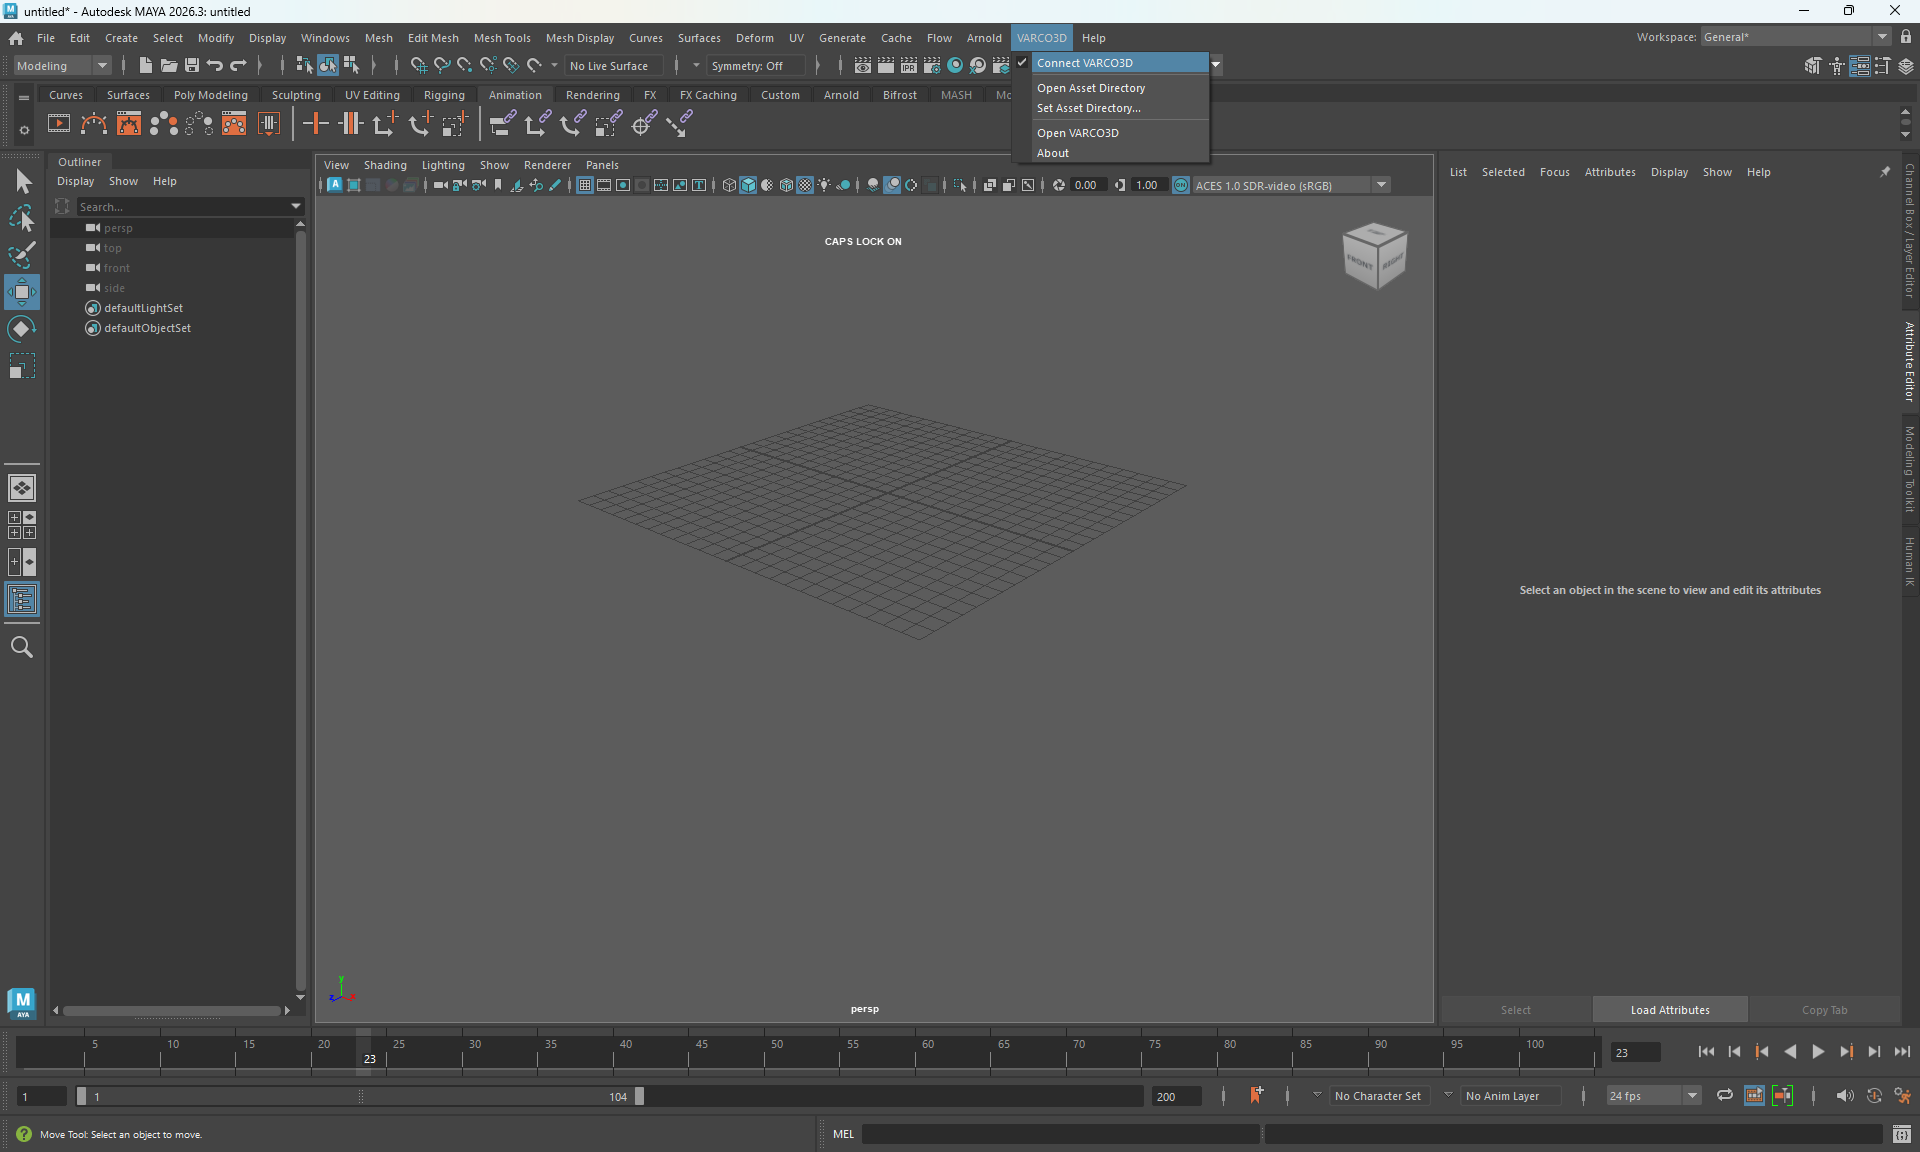
From the top menu, click VARCO3D > Connect VARCO3D.
This establishes the connection between Maya and VARCO 3D Studio so that assets can be exported into the running Maya session.
Step 2. Configure the asset download directory
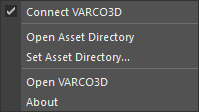
You can manage where downloaded assets are stored from the VARCO3D menu:
- VARCO3D > Open Asset Directory — Open the current asset download directory in your file explorer.
- VARCO3D > Set Asset Directory… — Change the asset download directory.
Step 3. Confirm the connection status in Studio
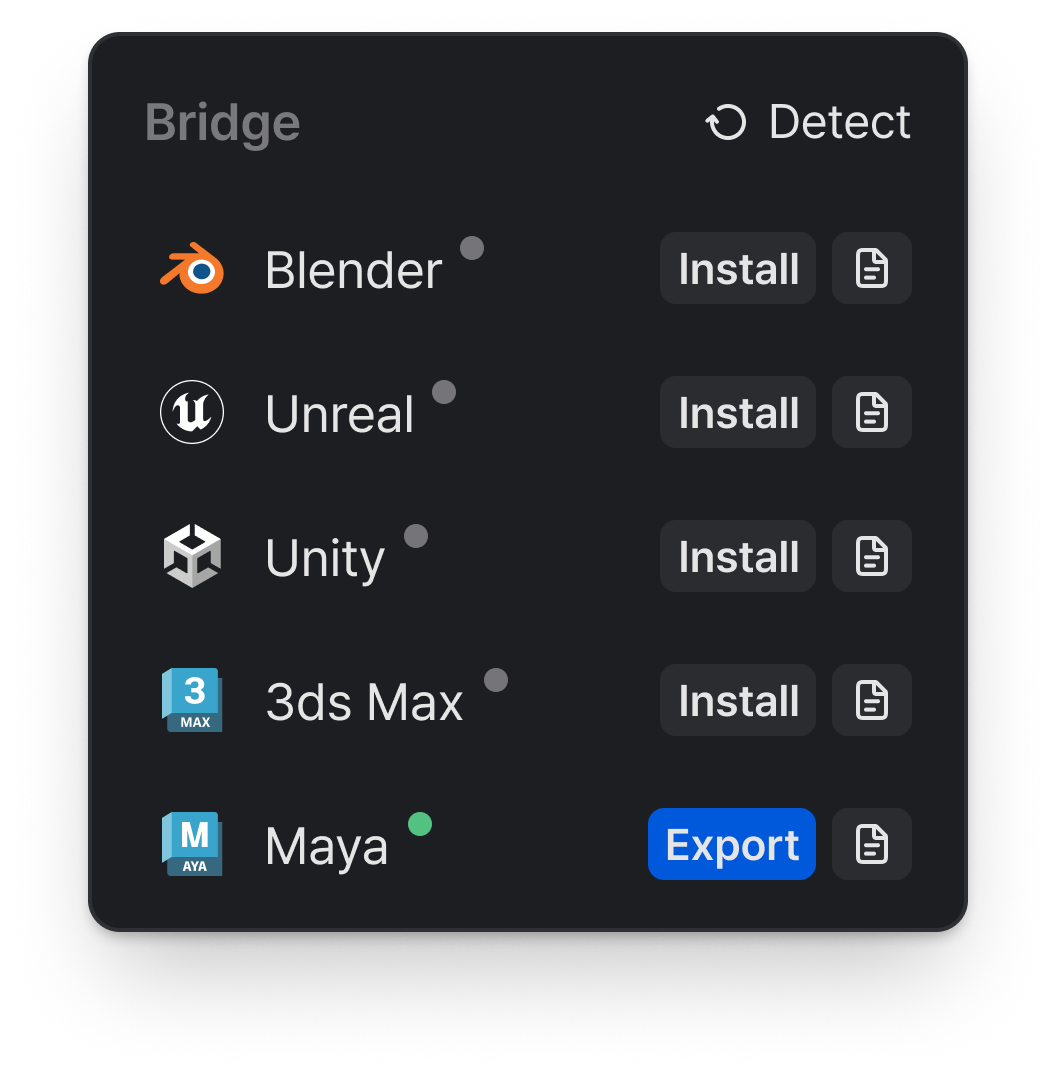
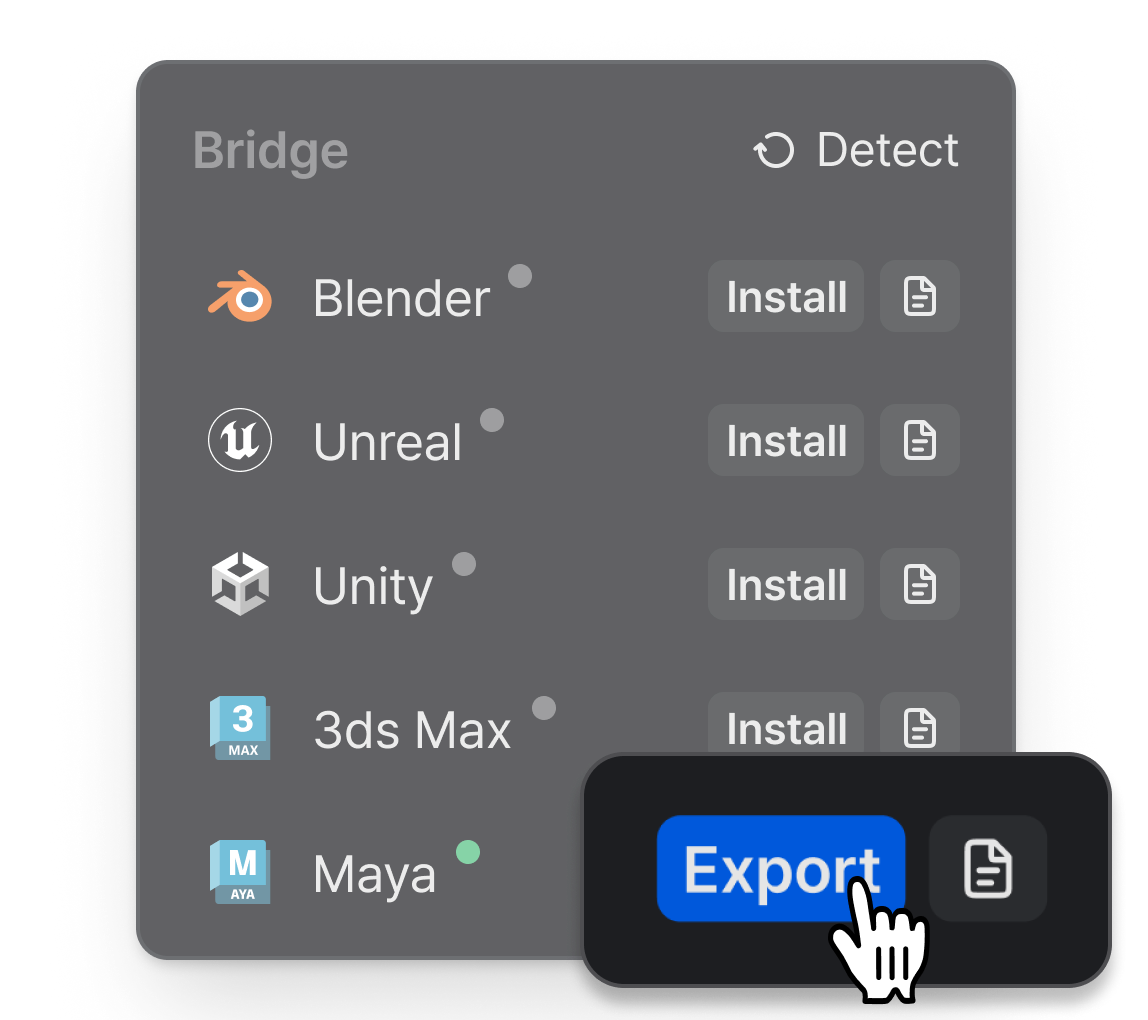
After connecting from Maya, return to VARCO 3D Studio and open the Bridge popup.
When the connection is detected successfully, the status dot in the popup will turn green. This indicates that Maya is connected and ready to receive data from VARCO 3D Studio.
If the dot does not turn green, click Detect in the bridge popup to refresh and check the connection again before proceeding.
Step 4. Export your VARCO 3D assets to Maya
Once the connection is detected, the Export button will become available in the bridge popup.
Click Export to send your assets directly to Maya through the bridge. This makes it easier to continue editing, shading, or refining your work in Maya without going through extra manual import steps.
Step 5. Confirm the export is complete
If the export is successful, you will see a notification like this.
This means your assets have been sent to Maya successfully and are ready to use.

You're all set to continue your workflow in Maya. Enjoy creating with VARCO 3D.